Wealth tax criticized by billionaires and Gavin Newsom would levy a one-time 5% tax on residents worth over $1bnA controversial proposal in California to impose a wealth tax on billionaires has gained enough signatures to qualify for the ballot in November, state officials...
Wealth tax criticized by billionaires and Gavin Newsom would levy a one-time 5% tax on residents worth over $1bn
A controversial proposal in California to impose a wealth tax on billionaires has gained enough signatures to qualify for the ballot in November, state officials announced on Wednesday.
The news is set to intensify an already heated debate around the tax, which has pitted tech moguls and the state’s governor, Gavin Newsom, against the labor unions backing the measure.
Custom agents let GitHub Copilot CLI understand your stack and team workflows, turning one-off terminal prompts into repeatable, reviewable processes. The post From one-off prompts to workflows: How to use custom agents in GitHub Copilot CLI appeared first on The GitHub Blog.
Developers work across many surfaces like the CLI, IDE, and GitHub. The terminal is often where they turn to move fast, automate tasks, or work directly with systems and scripts.
Tools like the GitHub Copilot CLI already make this easier. You can generate commands, debug issues, and move quicker without leaving the terminal.
However, like any environment, the CLI can still accumulate friction: re-running the same commands, re-explaining context, or translating logs for your team into something they can act on. These small steps add up, especially when every team’s stack and standards are a little different.
But what if your terminal didn’t just run commands, it understood your stack, your tools, and your team’s standards?
That’s where custom agents come in. Instead of starting from scratch each time, you can encode your team’s context into reusable workflows that go beyond one-off prompts.
With custom agents in the CLI, you can turn repeated tasks and patterns into consistent, reviewable workflows that fit naturally alongside your other tools, further tailoring GitHub Copilot CLI with expertise for specific development tasks.
What are custom agents?
A custom agent is a Copilot agent that can be defined using a Markdown file. Instead of relying on generic behavior, you describe how the agent should operate, what tools it can use, what standards it should follow, and what outputs it should produce. The result: its behavior is consistent wherever it runs.
Each coding agent you create can act as a specialized agent tailored for a specific task. For example, a generic coding agent might suggest how to clean up your code. But a custom agent can apply your formatting rules, tooling, accessibility standards, review requirements, and safety requirements every time it runs.
Custom agents are defined using agent profiles, or files that live directly in your repository. Written in Markdown, these agent profiles let you specify:
The agent’s role and area of expertise
Which tools it can access
Guardrails that keep outputs safe and consistent
The snippet below shows the beginning of an agent profile that acts as an expert assistant for web accessibility:
 ---

description: 'Expert assistant for web accessibility (WCAG 2.1/2.2), inclusive UX, and a11y testing'
name: 'Accessibility Expert'
model: GPT-4.1
tools: ['changes', 'codebase', 'edit/editFiles', 'extensions', 'web/fetch', 'findTestFiles', 'githubRepo', 'new', 'openSimpleBrowser', 'problems', 'runCommands', 'runTasks', 'runTests', 'search', 'searchResults', 'terminalLastCommand', 'terminalSelection', 'testFailure', 'usages', 'vscodeAPI']

# Accessibility Expert

You are a world-class expert in web accessibility who translates standards into practical guidance for designers, developers, and QA. You ensure products are inclusive, usable, and aligned with WCAG 2.1/2.2 across A/AA/AAA.

# Your Expertise

**Standards & Policy**: WCAG 2.1/2.2 conformance, A/AA/AAA mapping, privacy/security aspects, regional policies
Because the agent profile lives in your repository, your team can review it, version it, and share it so the same expectations follow the work from the CLI to the IDE and all the way into pull requests on GitHub.
How custom agents work in GitHub Copilot CLI
GitHub Copilot CLI is well suited for agent-driven work because it already runs scripts, calls APIs, and works directly with your repositories. Defining agents here lets you further tailor Copilot CLI by encoding execution-heavy workflows once, then invoking it from the terminal. The agent will execute your workflow the same way every time.
Invoke the agent from Copilot CLI. From the terminal, run the Copilot CLI and use the /agentslash command. Select the custom agent you want to use.
Create an agent profile in the.``github``/agentsdirectory of your target repository. The agent profile is a Markdown file with YAML frontmatter that defines the agent’s role, scope, capabilities, and guardrails, so it behaves consistently in your workflows. The agent profile file ends with .agent.md – for example, accessibility.agent.md.
Because the agent profile is a file in your repository, it can be reviewed, updated, and shared.
Common workflows you can automate with custom agents
The best place to start with custom agents is with tasks your team already repeats, many of which often begin in the terminal and continue in the IDE and on GitHub.
Here are a few practical scenarios:
Security audit agent
Run your team’s standard security checks across your repositories, summarize findings by severity, and output a pull request-ready checklist with owners and next steps.
# .github/agents/security-audit.md

---
name: Security audit

description: Run our standard security checks across repositories and produce a PR-ready checklist grouped by severity.

tools:

# Keep this list aligned with what your team actually runs in CI.

- gh
- git
- semgrep
- trivy
- gitleaks
- jq

---
## Instructions
You are the **Security audit** agent for this organization.

### Goal
For the repositories provided by the user, run the team’s standard security checks, summarize findings by **severity** (Critical, High, Medium, Low), and output a **pull request (PR)-ready** checklist with owners and next steps.

### Operating rules

- Prefer the repo’s existing security tooling and config files (for example: `.semgrep.yml`, `.trivyignore`, `.gitleaks.toml`) when present.
- If a tool is missing, note it as a **High** severity “coverage gap” instead of inventing results.
- Don’t paste secrets or full vulnerable payloads into output. Redact tokens and credentials.
- Use inclusive language (use allowlist/denylist).
- When referencing dates, use the format “March 23, 2026”.

### Standard checks to run (per repository)

1. Secret scanning locally:
- `gitleaks detect --redact --no-git --source .` (or use the repository’s preferred invocation)

2. Container scanning (if a container image or Dockerfile exists):
- `trivy fs .`

3. SAST (if semgrep config exists):
- `semgrep scan --config .semgrep.yml`

4. Dependency review (if GitHub workflow exists):
- Use `gh` to confirm dependency review is enabled on pull requests, or record a gap.

### Ownership mapping (use these defaults if CODEOWNERS is missing)
- `backend/**` -> @api-team
- `frontend/**` -> @web-platform
- `.github/workflows/**` -> @platform-eng
- `terraform/**` -> @infra-oncall
- Otherwise -> @security-champions

### Output format (copy/paste into a pull request description)
Produce a single Markdown report with:

- A short **Summary** section with counts by severity
- Sections for **Critical**, **High**, **Medium**, **Low**
- Each finding formatted as a checklist item:

Example item format:

- [ ] **[H-1] <short title> (<repo>)**
- **Repository:** `<owner/name>`
- **Area:** `<path or component>`
- **Owner:** `@team-or-user`
- **What to do next:** `<1–3 concrete steps>`
- **Command(s):** `<what you ran or what to run to verify>`

### Final step
At the end, add a “Next steps” section with:

- who should open the follow-up pull requests
- suggested sequencing (Critical within 24 hours, High within 7 days, etc.)
Infrastructure as code compliance agent
Review plans and manifests against your organization’s guardrails and policies. Highlight risky changes, and generate a concise, approval-ready summary.
# .github/agents/iac-compliance.md

---
name: IaC compliance

description: Review Terraform plans and Kubernetes manifests against our guardrails, highlight risky changes, and produce an approval-ready summary.

tools:

- gh
- terraform
- conftest
- opa
- kubeconform
- jq

---
## Instructions

You are the **IaC compliance** agent for this organization.

### Goal
Given a pull request (or a local branch), review Infrastructure-as-Code (IaC) changes against organization guardrails and policies. Highlight risky changes and produce a concise, approval-ready summary that a human can use to approve (or request changes) quickly.

### What to review

- Terraform:
- `*.tf`, `*.tfvars`, `*.tf.json`
- `terraform plan` output (when available)
- Kubernetes:
- `*.yml`, `*.yaml` manifests (including Helm-rendered output if provided)

### Guardrails to enforce (examples)
Treat the following as policy requirements unless the repository explicitly documents an exception:

- No publicly accessible resources unless explicitly approved (internet-facing load balancers, `0.0.0.0/0` ingress, public S3 buckets)
- No wildcard permissions in IAM policies (avoid `Action: "*"`, `Resource: "*"`)
- Encryption required at rest for managed storage services
- Require version pinning for Terraform providers and modules
- Kubernetes manifests must:
- Set resource requests and limits
- Avoid privileged containers and `hostNetwork: true`
- Avoid `latest` image tags
- Use non-root users where possible

### How to run checks (prefer what the repository already uses)

1. **Terraform plan (if Terraform changes exist)**

- `terraform fmt -check`
- `terraform init -backend=false`
- `terraform validate`
- `terraform plan -out tfplan`
- `terraform show -json tfplan > tfplan.json`

2. **Policy evaluation**

- If `policy/` exists, treat it as the source of truth for OPA policies.
- Run:
- `conftest test tfplan.json -p policy/`
- `conftest test k8s-rendered.yaml -p policy/` (if manifests exist)

3. **Manifest validation**

- `kubeconform -strict -summary <file-or-dir>`

### Risk scoring
Classify each notable finding into:

- **High risk**: likely security exposure or broad blast radius (public ingress, wildcard IAM, deletion of critical resources)
- **Medium risk**: potential operational impact (autoscaling changes, node selectors removed, timeouts reduced)
- **Low risk**: style, minor drift, missing metadata

### Output format (approval-ready)
Return a single Markdown section that a reviewer can paste into a pull request comment:

```markdown

## IaC compliance summary

**Scope:** Terraform and Kubernetes changes in this pull request
**Overall risk:** <Low|Medium|High>
**Policy result:** <Pass|Fail|Pass with notes>

### High-risk findings

- [ ] <finding> — **Owner:** @team — **Path:** `<path>` — **What to change:** <1 sentence>

### Medium-risk findings

- [ ] <finding> — **Owner:** @team — **Path:** `<path>` — **What to change:** <1 sentence>

### Low-risk findings

- [ ] <finding> — **Owner:** @team — **Path:** `<path>` — **What to change:** <1 sentence>

### Evidence (commands run)

- `terraform plan ...`
- `conftest test ...`
- `kubeconform ...`

### Recommendation

<Approve / Request changes / Block, with 1–3 bullets explaining why>

```
### Notes

- Be explicit about what changed and why it matters (developer-to-developer tone).
- If you can’t run a check (missing tooling, no plan output, etc.), call it out under **Evidence** as a gap.
- Don’t include secrets or full credentials in the output; redact them.
Release docs agent
Gather merged pull requests since the previous release, categorize them, and draft release notes in your team’s style. Update the repo’s CHANGELOG.md and include a short release checklist that includes tests, migrations, and rollout/rollback notes.
# .github/agents/release-docs.md

---
name: Release docs

description: Draft release notes from merged PRs since the previous release, update CHANGELOG.md, and output a short release checklist (tests, migrations, rollout/rollback).

tools:

- gh
- git

---
## Instructions

You are the **Release docs** agent for this repository.

### Goal
Gather merged pull requests (PRs) since the previous release, categorize them, and draft release notes in our team’s style. Update `CHANGELOG.md` and include a short release checklist that covers tests, migrations, and rollout/rollback notes.

### Inputs to request if missing

- The previous release tag (for example: `v1.12.3`)
- The new release version (for example: `v1.13.0`)
- The target branch (default: `main`)

### How to gather changes

1. Identify the compare range:
- Prefer `git` tags. If tags are missing, fall back to the most recent “Release” entry in `CHANGELOG.md`.

2. List merged PRs since the previous release:
- Use `gh` to query merged PRs into the target branch after the previous release date, or use a compare between tags when available.

3. Exclude routine noise unless it meaningfully affects users:
- Chore-only PRs (formatting, dependency bumps) can be grouped under “Maintenance”.

### Categorization (use these headings)

- Added
- Changed
- Fixed
- Security
- Performance
- Maintenance

### Style rules

- Write for developers. Be direct and practical.
- Use sentence case for headings.
- Don’t anthropomorphize the agent.
- Avoid “we” unless it’s necessary; prefer “you” where it’s actionable.
- Don’t invent impact or claims. If a PR title is unclear, use the PR body or ask for clarification.

### Output requirements

1. Produce a `CHANGELOG.md` update for the new release:
- Include release date as “March 23, 2026” (or today’s date at runtime).
- Include bullet points with PR numbers and short descriptions.

2. Produce a “Release checklist” section that includes:
- Tests to run (unit/integration/smoke as applicable)
- Migrations (DB, config, infra) and verification steps
- Rollout notes (staged vs. all-at-once)
- Rollback notes (how to revert and what to watch)

### File update instructions

- If `CHANGELOG.md` exists, append a new section at the top.
- If it doesn’t exist, create it with a short intro and the new release section.
- Only modify `CHANGELOG.md` unless the user explicitly asks to edit other files.

### Final response format
Return:

1. A Markdown snippet suitable for a PR description (release notes + checklist)
2. The updated `CHANGELOG.md` content to commit
Incident response agent
Given a service name and time window, gather “first look” data such as recent deploys, error rates, top endpoints, and relevant logs. Produce an incident report using your team’s template and suggest next steps.
# .github/agents/incident-response.md

---
name: Incident response

description: Gather first-look incident data (deploys, error rates, top endpoints, logs) for a service and time window, then draft an incident report and next steps.

tools:

- gh
- git
- jq
- curl

---
## Instructions

You are the **Incident response** agent.

### Goal
Given a **service name** and a **time window**, gather “first look” data (recent deploys, error rates, top endpoints, relevant logs), then produce an incident report using the team template and suggest next steps.

### Inputs (ask if missing)

- `service`: the service identifier (for example: `payments-api`)
- `start_time` and `end_time` (include time zone, for example: `March 23, 2026 10:00 am PT` to `March 23, 2026 11:00 am PT`)
- `environment`: `prod` by default unless specified
- `incident_commander`: the on-call or IC username/team

### Data sources
Prefer repository- and organization-standard sources first:

- Deploy history: GitHub deployments / Actions workflows / release tags
- Metrics endpoints (if documented), otherwise note the gap
- Logs endpoints (if documented), otherwise note the gap

If this repository includes runbooks or on-call docs, follow them.

### What to gather (first look)

1. **Recent deploys**
- Identify deploys/releases to the service in the time window ± 2 hours
- Include commit SHA, PR number, author, and deploy time if available

2. **Error rates and latency**
- Summarize changes over the window (baseline vs peak)
- If you can’t access metrics, state what you tried and what’s missing

3. **Top endpoints / hottest paths**
- List endpoints with highest error counts and/or latency regression

4. **Relevant logs**
- Provide a small set of representative log lines (redacted)
- Focus on new error signatures, timeouts, dependency failures, and auth issues
- Do not include secrets or customer PII

### Output: incident report template
Produce a single Markdown report:

```markdown

## Incident report: <service> — <short summary>

**Status:** <Investigating|Mitigated|Resolved>
**Severity:** <SEV-1|SEV-2|SEV-3>
**Environment:** <prod|staging|...>
**Time window:** <start> to <end>
**Incident commander:** <@user-or-team>
**Contributors:** <@user-or-team list>

### Customer impact
- <Who was affected and how, in 1–3 bullets>

### Timeline (first look)
- <time> — <event>
- <time> — <event>

### What changed (deploys in window)
- <deploy time> — <artifact/version> — <commit> — <PR> — <author>

### Metrics snapshot
- **Error rate:** <baseline> → <peak> → <current>
- **Latency (p95):** <baseline> → <peak> → <current>
- **Traffic:** <baseline> → <peak> → <current>

### Top failing endpoints

| Endpoint | Error type | Error count | Notes |

|---|---|---:|---|

| `/v1/...` | `5xx` | 0 | <note> |

### Logs (redacted)
- `<timestamp>` `<service>` `<level>` `<message>`
- `<timestamp>` `<service>` `<level>` `<message>`

### Suspected cause (hypothesis)
- <1–2 bullets. Clearly label as hypothesis.>

### Next steps

**Immediate (0–30 min)**
- [ ] <action> — **Owner:** <@team>

**Short term (today)**
- [ ] <action> — **Owner:** <@team>

**Follow-up (this week)**
- [ ] <action> — **Owner:** <@team>

```

### Notes

- Be explicit about uncertainty. If data is missing, write “Unknown (data unavailable)” and list what’s needed.
- Use inclusive language (allowlist/denylist).
- Use short, scannable bullets. Avoid hype and anthropomorphizing.
- Redact secrets and personal data.
How to choose between off-the-shelf agents vs. your own custom agents
These agents come with specific workflows and tool-specific knowledge baked in, making them a fast way to see immediate value without defining an agent from scratch (plus, you can always mod them to fit your exact needs). Teams often treat partner agents as a starting point to then create their own custom agent.
But you can also create your own custom agents with your own Markdown files that are more specific to your rules, tools, and conventions.
Useoff-the-shelfagents when you want to:
Try a working agent with minimal setup: No need to design prompts, outputs, or create guardrails from scratch.
Lean on tool-specific expertise: You’re using a partner product and want an agent that already knows the commands and best practices.
Standardize around a partner’s recommended practices: You want consistency with how a tool is intended to be used.
Cover repeatable tasks across repos: For example, baseline security checks, common reviews, or other patterns that apply to multiple services.
Use custom agents when you want to:
Define how your team gets work done: Your team has conventions like naming, review standards, and security checks, and you want the agent to follow them every time.
Integrate with your exact stack and internal tooling: Useful if you rely on things like internal APIs or nonstandard tooling that a partner agent wouldn’t know about.
Reduce glue work in your workflow: You can have an agent that runs the same sequence across incidents, releases, or audits.
Version and evolve your workflow like code: You can improve the agent over time, review changes, and share it across your team as a maintained asset.
💡 A good rule of thumb: Use off-the-shelf agents for speed and tool-specific best practices, and custom agents when you need precision, continuity, and control.
Once you’re ready to go, start with a workflow you already repeat, then make it consistent. Choose a task that happens every week and turn it into an agent that runs the same checks, uses the same tools, and produces the same reviewable output.
You can also create a small custom agent that you can continue to iterate on. For example:
Take a pull request title plus labels, and generate a correctly formatted CHANGELOG.md entry.
Turn a bug report into a structured issue comment with reproduction steps, environment information, severity, and suggested next steps.
Custom agents help standardize your workflows by taking the knowledge from scattered notes and one-use prompts and turning them into reusable, structured workflows you (and your team) can rely on.
This becomes especially valuable for teams, where the same task can be approached differently depending on who’s running it. With custom agents, these workflows become shared, repeatable, and easier to review.
They also let fast, execution-heavy tasks start in the CLI, carry context into the IDE, and land on GitHub as reviewable, shippable work. Rather than losing context between steps, agents help maintain continuity across your toolchain.
Once you encode the workflows that matter to your team, Copilot CLI becomes less about asking for help and more about reliably supporting how your team actually works day to day.
If an autonomous AI agent interacts with your company's core intellectual property today, can your security team instantly name the person who authorized it? For most enterprises, the answer is a simple no. The rush to adopt internal AI tools has left a massive trail of...
If an autonomous AI agent interacts with your company's core intellectual property today, can your security team instantly name the person who authorized it?
For most enterprises, the answer is a simple no.
The rush to adopt internal AI tools has left a massive trail of administrative debt: orphaned agents (AI tools left running after their creator leaves the company) and standing privileges (
GitHub Copilot CLI for Beginners: Learn how to use slash commands to control your terminal AI agent. The post GitHub Copilot CLI for Beginners: Overview of common slash commands appeared first on The GitHub Blog.
Welcome back to GitHub Copilot CLI for Beginners! In this series (available in video and blog format), we’ll give you everything you need to get started using GitHub Copilot CLI. So far in this series, we’ve covered how to get started and when to use interactive and non-interactive modes. In this edition, we’ll learn what slash commands are, why they matter, and how to use slash commands to control GitHub Copilot efficiently. You can complete tasks like switching models, checking token usage, and resuming past sessions right from your terminal.
Let’s dive in!
Understanding slash commands in GitHub Copilot CLI
When working in Copilot CLI, one of the most powerful concepts to learn early on is slash commands. Slash commands are built-in controls that you can access directly from the command line. Acting as your control surface within Copilot CLI, slash commands allow you to:
Guide Copilot’s behavior
Inspect changes
Manage context
Move efficiently across sessions and projects
Keep permissions tidy
Slash commands can be thought of as your command center for interacting with Copilot CLI. To look at all of the options available, just type / in the command line for a scrollable list of all currently supported slash commands.
Let’s take a look at some of the most popular ones.
Choosing the right model
Different models are optimized for different kinds of work. If you want to switch models, type /model into the command line. This will display a list of available models, along with key details like:
Capabilities: Some are better for quick, lightweight tasks like refactoring, while others more efficiently handle deeper reasoning such as feature planning.
Availability: The list may vary depending on your plan or organization’s settings.
Cost: Numbers shown on the right of each model indicate cost multiplier, helping you choose the right balance between performance and usage in relation to your plan.
Choosing the right model can significantly impact both speed and results.
Managing context and token usage
Copilot CLI operates within a context window, which determines how much information it can “remember” during a session. If you want to check your current usage, type /context to learn how many tokens you have left, along with system usage and available buffer.
If you find that you’re running low on space, you can free up space by typing /compact in the command line. This summarizes your current conversation so you can continue without having to start a new session. Copilot CLI will do this automatically when you approach the limit, but you can also do this manually if you want to transition to a new task or clean up context mid-session.
If you’d rather start fresh and completely reset your environment, you can use /clear to clear the session entirely.
Working across sessions
If you want to resume a previous session, you can type /resume. This will bring up a list of previous sessions you’ve had, including both local and remote sessions. Entering a previous session will show you your session history, and you can pick up right where you left off.
Inspecting changes
As you work with Copilot to make changes to your project, it’s important to keep track of what’s changed. If you want to see what the changes are, run /diff to see recent updates. This gives you a clear view of what modifications were made during your session, so you can validate changes before moving forward.
Navigating projects and directories
If you want to work across repositories or directories, you don’t have to exit Copilot. You can type /cwd to change your working directory to another repository. This allows you to scope Copilot’s work to a specific part of your project and helps you stay efficient while multitasking across codebases.
Managing tool permissions
In the past, you might have granted Copilot CLI permission to perform actions like editing files. Say you’re switching to a repository you want to be more careful in and want to reset those permissions: you can do so by running /reset-allowed-tools.
Take this with you
Using these slash commands gives you even better control over Copilot CLI—and the more familiar you become with them, the more deliberate your workflow becomes.
Whether you’re switching models, managing context, or navigating across projects, using slash commands in CLI gives you the tools you need to stay in control. And if you haven’t already: open up your terminal, type /, and explore! There are many more slash commands to discover.
Better orchestration, fewer handoffs, faster progress, without a single new knob. The post How we made GitHub Copilot CLI more selective about delegation appeared first on The GitHub Blog.
In agentic systems, more delegation isn’t always better. Imagine asking Copilot CLI to make a simple change. Instead of handling it directly, it spins up a helper agent that searches the repository, waits on a result, and stalls. Work that should have taken one step now takes three. While some tasks genuinely benefit from a specialist subagent—like exploring an unfamiliar repository, checking an independent area of the code, or running a long command while the main agent keeps moving—delegation isn’t free. Every handoff adds coordination overhead, tool calls, and wait time. If an agent delegates too eagerly, the “help” can become friction.
We recently released an improvement to our agentic harness called smarter subagent delegation. This makes Copilot CLI more selective by helping the main agent:
Stay focused when it can move faster on its own.
Delegate when a specialist creates real leverage.
Parallelize work when tasks are truly independent.
Smarter subagent delegation has now rolled out to 100% of Copilot CLI production traffic. If you want to get started today, simply update GitHub Copilot CLI by running the /update command in your terminal to version 1.0.42 or later.
In a production A/B test, this improvement reduced tool failures per session by 23%, including a 27% reduction in search tool failures and an 18% reduction in edit tool failures. It also improved total user wait time by 5% at P95 and 3% at P75, with no quality regression. Here, P95 captures wait time near the slowest 5% of sessions, while P75 reflects wait time toward the slower end of typical sessions. This means fewer unnecessary handoffs, fewer repeated searches, fewer failure-prone tool paths, and less waiting during long-running coding tasks.
In this post, we’ll walk through how we identified unnecessary delegation in Copilot CLI, what we changed to make delegation more selective, and how we validated those changes through offline evaluation and production A/B testing. We’ll also show why those changes led to fewer failures and less waiting—and what that looks like for developers using Copilot CLI day to day.
The problem: Delegation is powerful, but not free
Subagents are one of the most important capabilities in an agentic CLI. They let Copilot break down complex work, run investigations in parallel, and keep the main agent focused on coordinating the final answer. For large codebases and multi-step engineering tasks, that can be the difference between a slow linear workflow and an efficient parallel one.
But delegation introduces its own failure modes:
Unnecessary handoffs for simple tasks that the main agent could complete faster on its own.
Overuse of exploration subagents when the handoff already contains enough context.
Repeated or overlapping searches across the main agent and subagents.
Sequential delegation, where the main agent waits for a subagent instead of treating delegation as an opportunity for parallel work.
Failure-prone subagent paths, including stale file paths, moved files, incorrect relative paths, and workspace mismatches.
Figure 1. Example: tool call failure by subagents while main agent is idling.
Our goal: help developers use subagents when they create leverage, avoid them when they add overhead, and parallelize work when the task genuinely benefits from independent execution.
From problem signals to shipped improvement
The way we identified the problem became the way we solved it. Instead of treating agent trajectory analysis, product changes, evaluation, and rollout as separate activities, we used them as one feedback loop: observe the agent behavior, isolate the orchestration bottleneck, make a targeted change, validate it offline, measure it online, and ship only once the end-to-end workflow improved.
Figure 2. The end-to-end improvement loop: analyze, change, validate, and ship.
1. Analyze: Let LLMs identify the delegation bottleneck
Instead of manually reviewing agent sessions, we used LLMs to analyze full trajectories and identify where orchestration was helping versus where it was adding overhead. That analysis surfaced a consistent pattern: subagents were sometimes being invoked for tasks that were already narrow, obvious, or fully described in the handoff.
In those cases, the subagent could spend time re-searching the repository even though the main agent already had enough context to act directly. That clarified the improvement target: keep simple discovery-and-edit tasks in the main agent, and reserve subagents for work that is broader, cross-cutting, or naturally parallelizable.
2. Change: Refine the orchestration policy
After identifying the bottleneck, we used LLMs to help translate that diagnosis into a more selective orchestration policy.
Copilot CLI should handle focused work directly: find a file, read it, make a targeted change, and verify it. Delegation is more useful when the work requires independent context, broad exploration, or parallel execution.
In practice, that means starting with the narrowest effective path, escalating when complexity or uncertainty creates value, and stepping back down when the task becomes focused again. Subagents should be treated as a parallelism tool, not a pause button. When Copilot launches a subagent, the main agent should continue making progress on independent work rather than simply waiting for the result.
When a subagent is used, the handoff should also be specific: what the user asked, what is already known, what the subagent owns, and what kind of result the main agent needs back.
3. Validate: Test offline, confirm online, then ship
Before broad rollout, we validated the change with automatically generated regression cases and existing benchmarks. This helped confirm that the new delegation guidance reduced avoidable overhead without breaking cases where subagents genuinely add value.
Finally, we moved through staff and public A/B testing, then analyzed production metrics across reliability, responsiveness, subagent workload, and quality. The gains did not come primarily from making individual LLM calls faster. Instead, it reduced orchestration overhead by avoiding unnecessary subagent paths and lowering subagent workload per user.
That end-to-end process let us move from problem signal to shipped improvement while keeping the user experience stable: fewer avoidable handoffs, fewer failure-prone tool paths, and no quality regression.
Outcomes
After rolling smarter subagent delegation to production traffic, we saw measurable percentage improvements across reliability and responsiveness (Table 1):
Table 2. Directional agent trajectory analysis behind the A/B test outcome
These results show that better orchestration can improve the developer experience even when the visible feature surface doesn’t change. By teaching Copilot CLI when to delegate, when not to delegate, and how to parallelize the right work, we reduced friction in the agent loop itself.
That is the power of GitHub Copilot as a system: the experience gets better not because developers are given more switches to manage, but because Copilot becomes better at allocating models, tools, and subagents behind the scenes.
How this benefits developers today
For developers using Copilot CLI, this should feel like a smoother day-to-day experience. Straightforward tasks are more likely to be handled directly, complex tasks still get specialist help when it adds value, and long-running sessions keep moving with less unnecessary waiting. In practice, Copilot CLI becomes more efficient and less noisy without asking developers to work differently.
The change is intentionally behind the scenes. Your workflow stays the same, but Copilot CLI is better at coordinating the work: fewer unnecessary handoffs, less repeated search work, fewer failed tool paths, and faster progress on long-running or multi-step tasks.
What’s next
This work is one step toward our larger goal of improving how Copilot CLI chooses the right model, agent, and tools across your workflow. While having more agents and models available expands what Copilot can do, the value to developers depends on how well Copilot applies them across the work they are already doing, like reading files, running commands, and moving from an issue toward a pull request.
As tasks become more complex, the quality of that orchestration matters more. The best system is not the one that delegates the most, but the one that knows when to act directly, when to delegate, and how to keep work moving without adding friction.
The next step is making Copilot CLI more adaptive across models, agents, skills, and tools, so developers don’t have to decide whether a task needs a larger model, a specialist subagent, or a procedural skill. Copilot should make that decision based on the task, repository context, policy, and expected outcome.
We will continue improving how Copilot CLI plans work, coordinates subagents, and measures end-to-end outcomes. That includes better visibility into main-agent and subagent behavior, deeper analysis of failure reasons, and stronger proxy metrics for orchestration quality. The goal is simple: less waiting, fewer avoidable failures, and more useful progress from every agent session.
Get started today and share feedback
Update GitHub Copilot CLI by running the /update command in your terminal to version 1.0.42 or later.
Already tried it? We’d love to hear what you think. Share feedback with the /feedback command in a CLI session or open an issue in our public repository.
Acknowledgements
Smarter subagent delegation was made possible by collaboration across Code|AI, Copilot CLI, experimentation, human evaluation, and product teams. Thanks to everyone who helped identify the problem, design the process, validate the outcome, and ship the improvement to production.
Install and configure LSP servers for GitHub Copilot CLI, replacing brute-force grep/decompile with real code intelligence. The post Give GitHub Copilot CLI real code intelligence with language servers appeared first on The GitHub Blog.
Ever watched GitHub Copilot CLI extract a JAR file to a temporary directory, grep through .class files, and piece together an API signature from raw bytecode? The agent is resourceful, but without a language server, that’s the best it can do.
The Language Server Protocol (LSP) is the standard that powers go to definition, find references, and type resolution in editors like VS Code. It works just as well in the terminal. The LSP Setup skill automates the installation and configuration of LSP servers for Copilot CLI, so the agent gets precise, structured answers about your code instead of relying on text search heuristics.
In this post, you’ll learn how the skill works under the hood, see the configuration format it generates, and get set up for any of the 14 languages it supports today.
The problem: heuristic code understanding
Without an LSP server, the agent in GitHub Copilot CLI reverse-engineers API information through text search and binary extraction. For a Java project, that might look like:
# Find the dependency JAR
find ~/.m2/repository -name "*httpclient*.jar"

# Extract it to a temp directory
mkdir /tmp/httpclient && cd /tmp/httpclient
jar xf ~/.m2/repository/org/apache/httpcomponents/httpclient/4.5.14/httpclient-4.5.14.jar

# Search extracted class files for a method
grep -r "execute" --include="*.class" .
For Python, the agent might cat files inside site-packages. For TypeScript, it walks node_modules. These text-based approaches work for simple cases, but they’re doing pattern-matching over raw text rather than true semantic analysis, so they miss generics, overloads, and transitive types, and can’t see compiled bytecode at all. That’s exactly the gap a language server close.
An LSP server solves this structurally. When the agent sends a textDocument/definition request for a symbol, the language server returns the exact source location, fully resolved type, and signature.
How the LSP Setup skill works
When triggered, the skill executes a seven-step workflow:
1. Language selection
The agent uses ask_user with a set of choices to determine which language the user needs LSP support for. This drives all subsequent steps.
2. Operating system detection
The agent runs uname -s (or checks $env:OS / %OS% on Windows) to determine the target platform. Install commands vary by operating system. For example, brew install jdtls on macOS versus downloading from eclipse.org on Linux.
3. LSP server lookup
The skill includes a reference file (references/lsp-servers.md) with curated data for 14 languages: install commands per operating system, binary names, and ready-to-use config snippets. The agent reads this file and selects the matching entry.
4. Configuration scope
The agent asks whether the config should be:
User-level: ~/.copilot/lsp-config.json—applies to all repositories
Repository-level: lsp.json at the repository root or .github/lsp.json—scoped to a single project
Repository-level configuration takes precedence when both exist.
5. Installation
The agent runs the appropriate install command. For example:
# TypeScript on any OS
npm install -g typescript typescript-language-server

# Java on macOS
brew install jdtls

# Rust on any OS
rustup component add rust-analyzer
6. Configuration
The agent writes or merges an entry into the chosen config file. The format uses a lspServers object where each key is a server identifier:
args typically includes "--stdio" for standard I/O transport (some servers like jdtls handle this internally)
fileExtensions maps each extension (with leading dot) to a language identifier
Existing entries in the config file are preserved — the agent merges, never overwrites
7. Verification
The agent runs which <binary> (or where.exe on Windows) to confirm the server is accessible, then validates the config file is well-formed JSON.
Supported languages
The skill comes with a set of predefined language servers for several programming languages. If the coding agent faces one that it is not mapped out already, it will search for an appropriate server and walk you through manual configuration.
What changes after setup
Once an LSP server is configured, the CLI agent can:
Resolve types across dependencies — no more grepping through JAR files or node_modules
Jump to definitions in third-party libraries, even when source isn’t checked into the repository
Find all references to a symbol across the project
Read hover documentation for any function, class, or type
This means the agent spends less time on tool calls and produces more accurate code on the first pass. For you, that’s less time waiting while the agent decompiles a JAR file or greps through node_modules to answer a question your IDE already knows, and fewer wrong turns built on a misread signature. The agent reasons about your code with the same structured understanding you get from go-to-definition in your editor, so you can hand it bigger, gnarlier tasks and trust the result.
Restart GitHub Copilot CLI: if Copilot CLI is already running, type /exit first. Then relaunch copilot so it picks up the new skill.
Ask the agent to set up a language server: for example, “set up LSP for Java” or “enable code intelligence for Python”.
Verify: after the skill installs and configures the LSP server, restart Copilot CLI one more time (/exit, then relaunch), run /lsp to check the server status, and try go-to-definition on a symbol from one of your dependencies.
The skill is part of the Awesome Copilot project. It’s open source, so contributions and feedback are welcome!
After 48 years on the job, UBC's head groundskeeper said prepping pitches for Team Canada for the 2026 FIFA World Cup has been a learning experience.
Gary Bartley is UBC's head groundskeeper.
Courtesy of Siming Zheng
Gary Bartley, UBC's head groundskeeper, is prepping pitches for Team Canada's World Cup training.
He said he has learned a great deal about his trade, even after 48 years on the job.
At 66, Bartley said the World Cup is a career highlight and a once-in-a-lifetime experience.
This as-told-to essay is based on a conversation with Gary Bartley, 66, who is helping prepare the training pitches that Team Canada will use during the 2026 FIFA World Cup. It has been edited for length and clarity.
I've been in the industry since 1978, but I've never taken on a project this big before. Working on the World Cup is like working on the Super Bowl.
As the University of British Columbia's head groundskeeper for the National Soccer Development Centre (NSDC), where Team Canada will train during the 2026 FIFA World Cup, this is already a once-in-a-lifetime experience.
Even after 48 years on the job, it's still a huge learning opportunity at 66. I've had the chance to work with some of the top pitch managers, professors, and educators in the field, and it will really change how I work moving forward.
The National Soccer Development Centre is usually used by the Vancouver Whitecaps.
Courtesy of Vancouver Whitecaps FC
A typical day as a head groundskeeper
I started in turf care in 1978, when I was a teenager. My first job was on a golf course, and I worked my way up to a superintendent position before moving into sports equipment sales. Through that role, I was introduced to the people at the Vancouver Whitecaps, a professional soccer club that trains at the NSDC, and about 11 years ago, I joined the team at UBC.
When the Whitecaps are training here, which is usually five days a week, I get to work at 7 a.m. Before the players arrive, my team of seven is out on the field cutting grass, repairing divots, and doing whatever prep work is needed for the day's session.
The pitches at the NSDC were renovated before Team Canada arrived.
Courtesy of Vancouver Whitecaps FC
The Whitecaps usually arrive around 10:30 a.m., and one of us stays nearby to help with any watering needs. Once training is finished, we're repairing divots, cleaning up the pitch, and preparing it for the next day. On non-training days, we're usually doing maintenance work, such as vertical cutting or top dressing. Our normal shift runs from 7 a.m. to 3 p.m.
Getting the pitches World Cup ready
The World Cup hasn't changed our workday too much, but the main difference is that we've had to raise our standards and maintenance practices to meet FIFA's requirements. As a training site, we've got to keep conditions as close as possible to the main match pitch to ensure things are equal and fair for all teams.
Over the past few weeks, we've gone through major renovations since the Whitecaps finished training here in May. It was a very labor-intensive process. We carried out heavy verticutting, top dressing, overseeding, and re-sodded parts of the pitches.
Working on divots and repairs is physically hard work, and, even more so, mentally tedious. Walking-mowing the two pitches takes three mowers about 2.5 hours, and our staff can cover around 20,000 steps in a typical morning doing that.
Learning from experts has been so rewarding
Gary Bartley, 66, has been in turf care for almost 50 years.
Courtesy of Siming Zheng
The biggest surprise has been the level of detail involved. We're used to maintaining pitches for Major League Soccer, but FIFA's attention to detail has been eye-opening. They have invested a great deal of time and effort in researching improved agronomic practices and maintenance procedures.
I've got to learn about this from leading scholars from the University of Tennessee and Michigan State University, which has changed how we'll approach our practices moving forward with the Whitecaps. It's been a really rewarding process.
I've also been amazed by the level of detail around the whole tournament, from security to hospitality to guest services. These are areas you take for granted and that were on the periphery of my attention, but it's become clear how much work goes into staging the World Cup at this level.
It's a career highlight
My family is very excited and proud that I'm involved in this. I wasn't a soccer fan before I joined the Whitecaps. Now, I'm still not a fanatic, but I am a fan.
It's very rewarding to sit and look at a pitch and realize that world-class soccer players will be training on it. It makes you want to make it the best possible.
I got into this industry 48 years ago because I loved it, and I still do. Being as old as I am, it's amazing to have the opportunity to be involved in the World Cup and put an asterisk beside my career.
Love or hate Amazon, its 23-26 June Prime Day event is a good time to snag discounts on tech, fashion and more, including much-loved brands such as Anyday and CarawaySign up for the Filter US newsletter, your weekly guide to buying fewer, better thingsYou don’t have the wait...
Love or hate Amazon, its 23-26 June Prime Day event is a good time to snag discounts on tech, fashion and more, including much-loved brands such as Anyday and Caraway
You don’t have the wait until after Turkey Day: early summer is actually one of the best times of the year to snag a deal. Amazon is kicking off its annual summer sale on 23 June, and just as Christmas songs start playing in stores two months early, the company and many other retailers are slashing prices in advance.
We’ve handpicked 31 of the best deals based on products the Filter has tested and loved in the past, including discounts on some of our favorite brands such as Field Company, Anyday and Caraway. If you want to shop at Amazon, we’ve handpicked products that are actually worth your money, and very few require a Prime subscription. If you prefer other retailers, we have oodles of those too.
Google announced the transition from assistive AI to independent agents, highlighting the launch of the Gemini 3.5 series and major updates to its Antigravity agent-first development platform. For mobile developers, the post introduces new Android CLI tools, the Android Bench...
Google announced the transition from assistive AI to independent agents, highlighting the launch of the Gemini 3.5 series and major updates to its Antigravity agent-first development platform. For mobile developers, the post introduces new Android CLI tools, the Android Bench evaluation leaderboard, and an automated Migration agent designed to rapidly convert various frameworks into native Kotlin code. Web development is also being transformed through Chrome DevTools for agents, the HTML-in-Canvas API, and the proposal of WebMCP, an open web standard that enables browser-based AI agents to execute complex tasks.
I spent months building FLOW (vestelonflow.com) — a tool that analyzes bank statement PDFs and finds forgotten subscriptions, hidden fees, and recurring charges. Here's what I learned building it in 8 languages. The Problem Most personal finance apps require you to connect...
I spent months building FLOW (vestelonflow.com) — a tool that analyzes bank statement PDFs and finds forgotten subscriptions, hidden fees, and recurring charges.
Here's what I learned building it in 8 languages.
The Problem
Most personal finance apps require you to connect your bank account. For many people (especially in Europe), that's a dealbreaker. GDPR concerns, privacy fears, and simply not trusting third-party apps with banking credentials.
My insight: the data people need is already in their PDF bank statements. Every bank generates them. Most people never look past the total.
The Tech Stack
The core flow:
User uploads PDF bank statement
PDF text extraction (pdfplumber + fallback OCR)
Transaction parsing — this is the hard part
LLM categorization pipeline
Subscription detection (recurring charges with same merchant)
Report generation
The trickiest part was transaction parsing. Every bank formats their PDF differently. German banks look nothing like Slovak banks. We ended up building bank-specific parsers for the most common formats and a fallback generic parser.
The 8-Language Challenge
Supporting Slovak, Czech, German, French, Spanish, Polish, Arabic, and Chinese wasn't just about translating the UI. The financial terminology varies significantly:
"Permanent order" in English = "Trvalý príkaz" in Slovak = "Dauerauftrag" in German
Subscription detection keywords differ by region
Date/amount formats are locale-specific
We ended up with language-specific merchant dictionaries for common subscription services in each market.
What Actually Matters
The biggest lesson: people don't want a budgeting dashboard. They want a specific, actionable number.
"You're spending €137/month on forgotten subscriptions" converts. "Your spending breakdown by category" does not.
The product is live at vestelonflow.com — first report is free, no card required, no bank connection needed.
Happy to answer questions about the PDF parsing approach, the LLM pipeline, or the localization challenges.
For the last year, AI agents have been getting more powerful. The problem? Most of them still felt like developer tools. You had to work in terminals, manage configuration files, memorize commands, and scroll through endless logs just to understand what your agent was doing....
For the last year, AI agents have been getting more powerful.
The problem?
Most of them still felt like developer tools.
You had to work in terminals, manage configuration files, memorize commands, and scroll through endless logs just to understand what your agent was doing.
That’s fine if you’re a developer.
But if AI agents are going to become mainstream, they need something else:
A great user experience.
That’s exactly what Hermes Agent’s newly released Desktop App delivers.
🎥 Full video walkthrough
🤔 The Biggest Problem With AI Agents
Most AI agent frameworks have incredible capabilities:
Browse the web
Read and write files
Execute code
Automate workflows
Use multiple tools
Coordinate sub-agents
But using them often looks like this:
❌ Terminal windows everywhere
❌ Session IDs to manage manually
❌ Configuration files to edit
❌ Logs that are difficult to understand
❌ Very little visibility into what the agent is actually doing
For experienced developers, this is manageable.
For everyone else, it’s a major barrier.
🧠 What Is Hermes Agent?
Hermes Agent is an open-source AI agent framework created by the team at Nous Research.
It can run locally on your machine or on remote servers and connect to multiple AI providers including:
🧩 OpenAI
🌐 Gemini
🧠 Claude
🏠 Local models through Ollama
🔌 Other supported providers
Once connected, Hermes can:
Browse the web
Analyze documents
Run terminal commands
Automate workflows
Send messages
Manage emails
Create and execute multi-step plans
Think of it as an autonomous AI worker that can actually take action instead of only generating text.
✨ The Desktop App Changes Everything
The new desktop application provides a complete visual interface for managing and monitoring AI agents.
Instead of wondering what your agent is doing, you can now see everything.
📂 Session Management
Conversations are automatically organized.
Sessions are grouped by profile, making it much easier to manage multiple agents with different responsibilities.
You can also switch models with a single click without diving into configuration files.
🔍 Watch Your Agent Work
One of the most impressive features is transparency.
You can inspect:
🔎 Tool calls
📚 Sources used by the agent
⚙️ Workflow execution steps
🧠 Reasoning process
📈 Agent progress
This is incredibly useful when debugging workflows or understanding why an agent made a particular decision.
Most AI agent platforms treat this as a black box.
Hermes makes it visible.
🎙️ Voice Interaction
Hermes supports voice input directly from the desktop app.
You can simply speak to your agent and let the local transcription system convert speech into text.
Small feature.
Huge usability improvement.
👤 Profiles: Specialized AI Agents
This might be my favorite feature.
A Hermes Profile is essentially its own AI agent.
Each profile can have:
📝 Independent instructions
🧠 Separate memory
🛠️ Different tools
📚 Different skills
⚡ Unique capabilities
For example:
Software Engineering Agent
Research Agent
Content Creation Agent
Marketing Agent
Stock Research Agent
Instead of one general-purpose assistant, you can build an entire team of specialized AI workers.
🛠️ Skills and Tools
Hermes includes a powerful skill system.
What’s particularly interesting is that Hermes can generate new skills from your conversations over time.
The more you use it, the more personalized it becomes.
You can also selectively disable skills to:
🎯 Reduce context size
💰 Save tokens
⚡ Improve performance
This is a subtle feature that becomes very important at scale.
💬 Messaging Integrations
The desktop app supports integrations with external platforms such as:
💬 Discord
📱 Telegram
📨 WhatsApp
🔗 Other supported channels
Your agents can communicate and deliver updates outside the desktop application itself.
This opens the door to some very interesting automation workflows.
📦 Artifacts: Everything In One Place
One challenge with AI agents is finding things they created days ago.
Hermes solves this with Artifacts.
Generated files, images, links, and outputs are automatically collected into a centralized workspace.
No more hunting through old conversations.
⚙️ Advanced Settings For Power Users
The settings panel exposes a surprising amount of customization.
You can configure:
⚙️ AI Providers
🔑 API Keys
🎨 Appearance
🔌 MCP Integrations
🎙️ Voice Settings
🛠️ Tool Configuration
🌐 Gateway Settings
You can even assign different models to different tasks.
For example:
One model for reasoning
Another for vision
Another for web extraction
This level of flexibility is something advanced users will appreciate.
⏰ Autonomous Scheduled Agents
One feature I think is massively underrated:
📅 Cron Jobs
You can schedule agents to run automatically.
Examples:
📈 Daily stock market reports
📧 Email summaries
📰 Industry news monitoring
🏢 Competitor tracking
📊 Business intelligence reports
You define:
The task
The schedule
The delivery destination
Then Hermes runs it automatically.
Your AI agent becomes proactive instead of reactive.
👥 Multi-Agent Visibility
When Hermes encounters a complex task, it can spawn additional agents to help complete the work.
The Desktop App includes a dedicated view for monitoring these sub-agents.
You can watch:
👥 Which agents were created
📋 What tasks they are handling
🔄 Their current progress
🎯 How work is being coordinated
For anyone interested in multi-agent systems, this is fascinating to observe.
🎯 Why This Matters
The most important thing about this release isn’t the interface itself.
It’s what it represents.
AI agents are moving from:
“Developer-only tools”
to
“Tools anyone can use.”
The Desktop App dramatically lowers the barrier to entry while preserving the power that makes Hermes compelling.
And that’s exactly what the AI agent ecosystem needs right now.
What feature do you think is still missing from modern AI agent platforms? Let me know in the comments.
Google has announced the launch of version 0.1.0 of the Agent Development Kit (ADK) for Kotlin, alongside a specialized ADK library for Android. This open-source framework simplifies the creation of AI agents by managing complex orchestration, session sharing, and error...
Google has announced the launch of version 0.1.0 of the Agent Development Kit (ADK) for Kotlin, alongside a specialized ADK library for Android. This open-source framework simplifies the creation of AI agents by managing complex orchestration, session sharing, and error handling across cloud and edge environments. The release supports hybrid orchestration, enabling developers to build multi-agent systems where a cloud-based model can seamlessly offload specific tasks to local, on-device models like Gemini Nano to enhance user privacy.
Rolfe Winkler, reporting for The Wall Street Journal (gift link): Apple plans to raise prices on its products to offset the surging costs of memory and storage chips, Chief Executive Tim Cook said in an exclusive interview with The Wall Street Journal. “Unfortunately, price...
Rolfe Winkler, reporting for The Wall Street Journal (gift link):
Apple plans to raise prices on its products to offset the surging
costs of memory and storage chips, Chief Executive Tim Cook said
in an exclusive interview with The Wall Street Journal.
“Unfortunately, price increases are unavoidable,” he said. “We’re
doing our best to mitigate the huge increases that are being
passed to us, and we’ve been trying to shield our customers from
the increases, but the situation has become unsustainable.”
Cook declined to offer details on the timing or scale of the
planned price increases, nor which products would be affected.
Apple’s next major product launch is likely to be in September
when it releases the iPhone 18 lineup, expected to include a new
foldable iPhone. [...]
Cook said Apple wouldn’t use its cash and silicon expertise to
build its own memory and storage factories. “We can’t do
everything,” said Cook. “We know what we’re good at.” [...] Cook
said during his time working in the electronics supply chain, from
IBM to Compaq to Apple, he had never seen a commodity price swing
like the one from the past six months. “This is a hundred-year
flood,” said Cook. “I’ve never seen anything like it in any area
in over 40 years.”
Apple, to my recollection, has never before issued a warning about price increases. Keep in mind that Apple deals with prices in a very different way from its competitors. For Apple, prices are part of a product’s brand, so they don’t fluctuate with component costs. The trash can Mac Pro held its $3000 starting price for six years, despite its specs remaining effectively unchanged in that span.
So when Apple raises prices on the iPhone 18 Pro models this September (and, presumably, launches the folding iPhone “Ultra” with an eye-watering price), expect those prices to stick. And if Apple expects RAM and SSD component pricing to continue rising through 2027 — which is what many anticipate — they might build that into the pricing now. Raise prices by (say) $200 now rather than $100 this year and another $100 next year.
Also, credit to Tim Cook for taking this one personally, months ahead of the iPhone 18 launch, rather than leaving it to John Ternus to serve up a surprise shit sandwich in his first keynote as CEO.
About 47% of singles look negatively at the use of AI in dating -- but, many dating app users are open to AI helping with profile punch-ups and conversation starters.
About 47% of singles look negatively at the use of AI in dating -- but, many dating app users are open to AI helping with profile punch-ups and conversation starters.
Google is unifying its AI terminal tools by transitioning the community-focused Gemini CLI into Antigravity CLI, a new agent-first platform built for complex, multi-agent workflows. This new Go-based tool offers faster execution, asynchronous processing, and a unified...
Google is unifying its AI terminal tools by transitioning the community-focused Gemini CLI into Antigravity CLI, a new agent-first platform built for complex, multi-agent workflows. This new Go-based tool offers faster execution, asynchronous processing, and a unified architecture that syncs with the Antigravity 2.0 desktop application. While enterprise customers will maintain existing access, individual and free users must transition to the new platform before Gemini CLI stops serving requests on June 18, 2026.
F5 has released security updates to address two critical security flaws in NGINX Open Source that could be exploited to achieve code execution on affected systems. The vulnerabilities are listed below - CVE-2026-42530 (CVSS v4 score: 9.2) - A use-after-free vulnerability in...
F5 has released security updates to address two critical security flaws in NGINX Open Source that could be exploited to achieve code execution on affected systems.
The vulnerabilities are listed below -
CVE-2026-42530 (CVSS v4 score: 9.2) - A use-after-free vulnerability in the ngx_http_v3_module that could be triggered by a remote unauthenticated attacker when NGINX Open Source is
The Google Cloud and NVIDIA developer community is celebrating its first anniversary with 100,000 members and a renewed focus on providing builders with advanced AI infrastructure and resources. To accelerate development, the community offers curated learning pathways for...
The Google Cloud and NVIDIA developer community is celebrating its first anniversary with 100,000 members and a renewed focus on providing builders with advanced AI infrastructure and resources. To accelerate development, the community offers curated learning pathways for mastering LLM optimization, GPU-accelerated data analytics, and monthly expert-led webinars. Moving into its second year, the initiative will expand to include hands-on labs, engineering events, and specialized content focused on the growth of agentic AI.
One of those nuances to keep in your back pocket when writing for screen readers. There’s no need to include ‘navigation’ in your navigation labels originally handwritten and published with love on CSS-Tricks. You should really get the newsletter as well.
And now to the reason I wrote this post: including the word “navigation” in your <nav> labels. There’s no need. If we did, we’d hear something like “Navigation, Primary navigation”. Not the end of the world, but unnecessarily repetitive for screen reader users.
One of those nuances to keep in your back pocket when writing for screen readers. Reminds me, too, that there’s no need to say something like “image” when describing one in the alt text. That’s sorta implied. While I’m no screen reading native, I imagine these sorts of things are minor pet peeves that, given a little love and consideration, make navigating that much more enjoyable.
Google is expanding its smart home ecosystem by launching a full-stack Gemini AI offering that integrates advanced camera intelligence, natural language queries, and daily activity summaries. This initiative provides service providers and hardware manufacturers with turnkey...
Google is expanding its smart home ecosystem by launching a full-stack Gemini AI offering that integrates advanced camera intelligence, natural language queries, and daily activity summaries. This initiative provides service providers and hardware manufacturers with turnkey reference designs and APIs to build proactive, branded services without extensive research and development. Ultimately, the program aims to move beyond basic device control toward an AI-native home that can understand context and care for users' needs in real time.
As the pornography platform has exploded in popularity, a side industry has emerged: middlemen who encourage young women into the industry, then take a large cut of their earningsMarkuss Hussle wants his online students to understand one thing: he knows how to make money....
As the pornography platform has exploded in popularity, a side industry has emerged: middlemen who encourage young women into the industry, then take a large cut of their earnings
Markuss Hussle wants his online students to understand one thing: he knows how to make money. There is no subtlety involved. He gives an hour-long presentation in one video, sitting next to his silver Lamborghini. In another, he splices his money-making tips with footage of a ski weekend with his friends in Courchevel, in the French Alps, including shots of private jets, helicopters and a girlfriend in a fur coat. He claims the trip cost $100,000 (£75,000). He shows off his watches and his swimming pool and talks about how his mother worked three jobs as a cleaner until he “retired her” and bought her a home by the sea.
If you were not paying close attention to the spreadsheets and presentations interspersed with the motivational lifestyle content, you might guess he was offering guidance on how to trade shares or invest in cryptocurrency. There are a lot of performance graphs and much discussion of account management, optimisation, scaling, working smart and tripling profits.
On 14 April, the Trump administration quietly acknowledged the widespread use of AI to automate government processes. The office of management and budget (OMB) disclosed a staggering 3,611 active or planned use cases for AI across the federal government. The list has...
On 14 April, the Trump administration quietly acknowledged the widespread use of AI to automate government processes. The office of management and budget (OMB) disclosed a staggering 3,611 active or planned use cases for AI across the federal government. The list has ballooned by 70% from the one published in the final year of the Biden administration, and includes many disturbing-seeming plans to hand over sensitive governmental functions to AI.
Scanning this list, many readers may find many causes for alarm. It represents a transfer of decision processes from human to machine on a massive scale over matters of individual freedom, public health and well-being, nuclear reactor safety and more.
Consider these examples. The Health and Human Services’ (HHS) office of administration for children and families hired the world’s “scariest AI company,” Palantir—notorious for its work on behalf of the military, the CIA and ICE—to scan all grant applications to flag those not ideologically aligned with the administration’s dictates. The Federal Bureau of Prisons is developing an AI system to assess the “potential for misconduct for newly admitted inmates,” routing people into high-security confinement before they have actually done anything wrong in their custody. These read like programs fit for a Philip K Dick or George Orwell novel.
Other use cases insert AI into life-and-death decision making. The Department of Veterans Affairs is developing an AI that will listen in on calls to the veterans crisis line, and then gather information from external databases to assess the mental state and suicide risk of the caller.
The Department of Energy is testing the use of AI to control nuclear reactors, targeting a way to autonomously respond to potential nuclear safety incidents. Here’s one that’s disturbing for its retirement, rather than its deployment: the state department has ended a program to use AI to forecast mass civilian killings, which had been intended to aid conflict prevention.
While it’s easy to raise questions about these and similar uses of AI, the reality is that any of these programs could be implemented responsibly. In some cases, like the HHS system, the AI might be enforcing alignment to a policy prescription that opponents abhor. But that concern is more about the policy itself rather than the idea that agencies should comply with executive orders.
In other cases, there may even be bipartisan agreement on the goal, like taking urgent action to help veterans at risk of self-harm. Lots of work and validation is needed to prove AI safe and effective for these use cases and convince the public it is appropriate, but the idea is plausible.
In other cases, a scary-sounding AI use may not even be new. The use of predictive methods and statistics to assign prisoner security classifications goes back decades, even if such systems are often biased and ineffective.
Using autonomous systems for model predictive control (MPC) of nuclear reactors is a well studied, and a widely applied aspect of nuclear plant management. And the recently disclosed addition of AI was initiated under the Biden administration.
But anyone reviewing the 2025 inventory could be forgiven for leaping to severe conclusions. What matters are the details of how the AI system is used, and here the inventory is severely lacking.
The disclosures carry minimal information, and lack the context necessary to understand their purpose and approach. The descriptions are typically just a sentence, and rarely more than a paragraph.
And while the process theoretically involves some form of public consultation, in reality there is generally none. It would take an eagle-eyed citizen to even come across this disclosure. Unless you read FedScoop regularly, or watch the OMB’s federal chief information officer’s GitHub account, you probably missed it.
Only one of the examples cited above (the DoJ) even proposes to involve the public. Under the administration’s policy, it’s not required for the rest because they are not classified as “high impact” use cases—a label that is applied inconsistently across agencies.
We wrote a book surveying applications of AI to democratic processes worldwide, including executive agencies as well as the courts, legislatures and politics. Our conclusion was that, while there are inappropriate applications of AI in governance that should be resisted, an urgent need to reform the economics of AI, and an imperative for renovating the democratic systems it is being unleashed on, there are also valuable and beneficial use cases for AI in government.
Machine translation is a good example. Customs and Border Protection (CBP) has deployed an AI translation system to help officers when human interpreters are not available. The idea that CBP, an agency under heavy scrutiny for reported abuses of human rights, would direct people to talk to a machine instead of a person may strike many as inhumane.
It’s true that human interpreters have very real advantages when it comes to understanding nuance from physical cues and social context. But an officer with a competent AI translator available immediately is better than one who cannot communicate with the person in front of them.
The Trump administration’s AI use case inventory has 70 such translation use cases, up from 58 in the Biden administration’s 2024 disclosure.
Disclosure of AI use cases could be a means to build public confidence and trust, but only if paired with consistent, meaningful public consultation. Washington DC and California are actively engaging the public to determine where and how it’s appropriate to use AI in government processes, or for government to regulate AI use in society.
Both have held public deliberations on this topic at a wide scale, using AI platforms. These examples demonstrate the potential for capturing broad-based public input to steer AI policy.
The international gold standard was arguably set by the French in 2016, via their Digital Republic Act. The law, itself informed by an online citizen consultation, requires all algorithms used to automate government administrative decisions to be subject to public records requests, to be appealable to a human reviewer, and to have mandatory notification of the use of automation to those affected by the decisions.
Canada offers another example of what more rigorous and participatory disclosure might look like. In 2025, they launched an AI use case registry, not unlike the US inventory. However, Canada also has a federal directive mandating a transparent risk-scoring and impact assessment process for automated systems that make administrative decisions about citizens.
That longstanding directive requires a detailed explanation of risks and benefits as well as consultation with certain stakeholders from the conception of the AI use case. The Canadian system could be improved; it could require a public comment period and an obligation for agencies to respond substantively to feedback before engaging in sensitive uses of AI.
AI offers real potential to improve the efficacy, efficiency and accessibility of government. But, equally, there is legitimate reason for public concern and distrust that can only be addressed through transparency and dialog. The US should adopt, at the federal and state level, algorithmic impact risk assessment procedures and public comment processes to facilitate a safe, trusted, equitable transformation of government agencies to take advantage of modern technology.
This essay was written with Nathan E. Sanders, and originally appeared in The Guardian.
Canadian authorities on Wednesday arrested a 23-year-old Ottawa man on suspicion of building and operating Kimwolf, a fast spreading Internet-of-Things botnet that enslaved millions of devices for use in a series of massive distributed denial-of-service (DDoS) attacks over...
Canadian authorities on Wednesday arrested a 23-year-old Ottawa man on suspicion of building and operating Kimwolf, a fast spreading Internet-of-Things botnet that enslaved millions of devices for use in a series of massive distributed denial-of-service (DDoS) attacks over the past six months. KrebsOnSecurity publicly named the suspect in February 2026 after the accused launched a volley of DDoS, doxing and swatting campaigns against this author and a security researcher. He now faces criminal hacking charges in both Canada and the United States.
A criminal complaint unsealed today in an Alaska district court charges Jacob Butler, a.k.a. “Dort,” of Ottawa, Canada with operating the Kimwolf DDoS botnet. A statement from the Department of Justice says the complaint against Butler was unsealed following the defendant’s arrest in Canada by the Ontario Provincial Police pursuant to a U.S. extradition warrant. Butler is currently in Canadian custody awaiting an initial court hearing scheduled for early next week.
The government said Kimwolf targeted infected devices which were traditionally “firewalled” from the rest of the internet, such as digital photo frames and web cameras. The infected systems were then rented to other cybercriminals, or forced to participate in record-smashing DDoS attacks, as well as assaults that affected Internet address ranges for the Department of Defense. Consequently, the DoD’s Defense Criminal Investigative Service is investigating the case, with assistance from the FBI field office in Anchorage.
“KimWolf was tied to DDoS attacks which were measured at nearly 30 Terabits per second, a record in recorded DDoS attack volume,” the Justice Department statement reads. “These attacks resulted in financial losses which, for some victims, exceeded one million dollars. The KimWolf botnet is alleged to have issued over 25,000 attack commands.”
On March 19, U.S. authorities joined international law enforcement partners in seizing the technical infrastructure for Kimwolf and three other large DDoS botnets — named Aisuru, JackSkid and Mossad — that were all competing for the same pool of vulnerable devices.
On February 28, KrebsOnSecurity identified Butler as the Kimwolf botmaster after digging through his various email addresses, registrations on the cybercrime forums, and posts to public Telegram and Discord servers. However, Dort continued to threaten and harass researchers who helped track down his real-life identity and dramatically slow the spread of his botnet.
Dort claimed responsibility for at least two swatting attacks targeting the founder of Synthient, a security startup that helped to secure a widespread critical security weakness that Kimwolf was using to spread faster and more effectively than any other IoT botnet out there. Synthient was among many technology companies thanked by the Justice Department today, and Synthient’s founder Ben Brundage told KrebsOnSecurity he’s relieved Butler is in custody.
“Hopefully this will end the harassment,” Brundage said.
An excerpt from the criminal complaint against Butler, detailing how he ordered a swatting attack against Ben Brundage, the founder of the security firm Synthient.
The government says investigators connected Butler to the administration of the KimWolf botnet through IP address, online account information, transaction records, and online messaging application records obtained through the issuance of legal process. The criminal complaint against Butler (PDF) shows he did little to separate his real-life and cybercriminal identities (something we demonstrated in our February unmasking of Dort).
In April, the Justice Department joined authorities across Europe in seizing domain names tied to nearly four-dozen DDoS-for-hire services, although because of a bureaucratic mix-up the list of seized domains has remain sealed until today. The DOJ said at least one of those services collaborated with Butler’s Kimwolf botnet.
A statement from the Ontario Provincial Police said a search warrant was executed on March 19 at Butler’s address in Ottawa, where they seized multiple devices. As a result of that investigation, Butler was arrested and charged this week with unauthorized user of computer; possession of device to obtain unauthorized use of computer system or to commit mischief; and mischief in relation to computer data. He is scheduled to remain in custody until a hearing on May 26.
In the United States, Butler is facing one count of aiding and abetting computer intrusion. If extradited, tried and convicted in a U.S. court, Butler could face up to 10 years in prison, although that maximum sentence would likely be heavily tempered by considerations in the U.S. Sentencing Guidelines, which make allowances for mitigating factors such as youth, lack of criminal history and level of cooperation with investigators.
Researcher Karan Singhal drives OpenAI's goal to elevate ChatGPT's health advice, reaching millions of users weekly for wellness guidance.
OpenAI health researcher Karan Singhal.
OpenAI
OpenAI says more than 230 million people use ChatGPT for health and wellness advice each week.
Researcher Karan Singhal leads the effort to grow that number by improving the company's technology.
Singhal spoke with Business Insider about his work in providing medical context in ChatGPT.
OpenAI is pushing further into its health research as more people turn to ChatGPT for pressing medical questions.
More than 230 million people use the tool for health and wellness advice each week, according to OpenAI. That growth is partially thanks to researcher Karan Singhal, who spoke exclusively with Business Insider about the company's lofty healthcare ambitions.
Singhal leads a high-stakes goal: make ChatGPT so good on health that it changes people's lives for the better, avoids calamity, and sways the skeptics. He wants to aid a shift he already sees underway, in which more patients trust OpenAI's latest model as a "protector in their care journey."
OpenAI's GPT-5 model family is the company's first to be trained specifically at every stage of development to be better at health advice, he said.
"You definitely want the models to be ahead of everything else," Singhal said.
At OpenAI, healthcare has grown into a top priority
Before joining OpenAI, Singhal made his name as a researcher at Google, helping develop a series of AI models known as Med-PaLM, specifically designed for medical questions. Since then, Google has cut investment in Med-PaLM, Singhal said, because AI developers favor general-purpose models.
In the middle of 2024, when Singhal joined OpenAI, GPT-4o was the company's flagship model. It would later come under fire in lawsuits alleging that it had encouraged suicidal ideation and given harmful advice. Those lawsuits are still unfolding — OpenAI has denied liability and wrongdoing.
In the meantime, the company hasn't shied away from health-related use. In fact, it has dug in further.
Singhal said that when he joined, he felt a "responsibility" to improve the quality of the models' health answers. He quickly set about building a new team of health researchers, and kicked off partnerships with more than 200 physicians — a bet, as he put it, on "aggregating the wisdom of the crowd."
About a year later, he helped launchHealthBench, a series of evaluations that the company created with the physician group to measure AI systems' health capabilities.
"Once you know how to evaluate it, it becomes a lot easier to improve it," Singhal said.
OpenAI's latest free model, GPT-5.5 Instant, scored better than both physician-written answers and GPT-4o in tests, the company said Thursday.Comparing billions of anonymized messages about health, they also said they found a 71% drop over the last two months in responses that were flagged for inaccuracy.
There's pressure to keep those improvements going for both patients and clinicians who use the tools. Singhal said he's seen doctors rapidly adopt ChatGPT for Clinicians and other AI tools, and he doesn't feel that hospitals and clinics are resistant to AI.
"If you think about the adoption of technology in healthcare broadly, it's actually incredibly, insanely fast," Singhal said.
Singhal wants ChatGPT to get to know you better
Google Search has, for years, been the dominant peddler of healthcare information online, connecting users to websites like WebMD. Singhal sees chatbots as an upgrade, where back-and-forth conversations give people more specific advice.
One of the biggest challenges to getting valuable health information from a chatbot is how little it knows about the patient. A doctor might have your medical records in their hand or know you from a yearslong relationship. OpenAI is trying to simulate both.
For one, in January, the company announced a health-focused product within ChatGPT that connects to health apps and lets users upload medical records. Singhal gave the example of uploading his sleep data from his Apple Watch. He let the app analyze it, and learned that he was missing out on deep sleep because his bedroom was too warm.
ChatGPT Health still has a waitlist more than five months after its launch.
Singhal's team sees the effort to make an AI model seek additional information as a top priority: a chatbot should ask questions like a doctor would, so it can say the right thing.
The team also wants to make the case that AI can bring value to everyone in health, not just "power users."
"People's adoption will only move at the speed of people's readiness in practice, and so you have to guide people towards that, especially as the technology improves," Singhal said.
Have a tip? Contact this reporter via email at scouncil@businessinsider.com, or over text, Signal, Telegram, or WhatsApp at 415-757-8198. Use a personal email address, a nonwork WiFi network, and a nonwork device; here's ourguide to sharing information securely.
In a Wall Street Journal interview, Apple CEO Tim Cook confirmed plans to raise product prices due to the supply pressure and cost increases on memory and storage chips.
In a Wall Street Journal interview, Apple CEO Tim Cook confirmed plans to raise product prices due to the supply pressure and cost increases on memory and storage chips.
Beat Amazon Prime Day 2026 with Sam's Club Instant Savings. Get deals on premium TVs, home & kitchen tech, speakers, laptops, and more without a Prime fee.
Beat Amazon Prime Day 2026 with Sam's Club Instant Savings. Get deals on premium TVs, home & kitchen tech, speakers, laptops, and more without a Prime fee.
CSS functions, the alpha() function, Grid Lanes, some things about Dialog that you might not know, CSS Wordle, and more — this is What’s !important right now. What’s !important #13: @function, alpha(), CSS Wordle, and More originally handwritten and published with love on...
CSS functions, the alpha() function, Grid Lanes, some things about <dialog> that you might not know, CSS Wordle, and more — this is What’s !important right now.
CSS functions, expertly explained
Jane Ori expertly explained how CSS functions work. @function will probably be the biggest CSS feature to probably become Baseline this year, so I definitely found it a bit intimidating at first. That is, until I read Jane’s baby-step-by-baby-step walkthrough, which eases you into it really well.
Speaking of functions, the alpha() function caught me by surprise. Firstly, because I hadn’t heard of it, and secondly, because…why? We can already change the alpha channel:
/* This */
color: alpha(from var(--color) / 0.5);

/* Instead of this */
color: oklch(from var(--color) l c h / 0.5);
Well, this comment from Jason Leo sums it up. Firstly, it means that we won’t need to hard-code color values when we already have CSS variables. For years I’ve circumvented this by only storing the actual values in CSS variables, but having to wrap them in the color function every single time is really monotonous:
/* Just the values */
--color: 0.65 0.23 230;

/* Then use them flexibly */
color: oklch(var(--color));
color: oklch(var(--color) / 0.5);
But it’s better than this (in my opinion):
/* Function and values */
--color: oklch(0.65 0.23 230);

/* Delightful */
color: var(--color);

/* Delightless */
color: oklch(from var(--color) l c h / 0.5);
alpha() offers the best of both worlds:
/* Less delightless */
color: alpha(from var(--color) / 0.5);
Secondly, the color format is actually irrelevant in this context, so alpha(from var(--color) / 0.5) communicates the intention more clearly than oklch(from var(--color) l c h / 0.5) does. It also makes the declaration inherently shorter.
WebKit launched the Field Guide to Grid Lanes (formerly known as CSS masonry layout). If you’ve ever read one of our CSS-Tricks Guides, it’s similar to that (their words — just sayin’). It’s a smooth introduction with a variety of barebones and real-world demos.
Una Kravets talked about two quality-of-life upgrades for <dialog> — the new closedby attribute, which isn’t supported by Safari yet, and overscroll-behavior: contain. There are some nuggets in the comments too, including a tip about scrollbar-gutter: stable.
✅ Nice lil btn scale-down
🙈 Layout change bc the scroll bar disappears
🙈 No light dismiss
These UX problems can easily be solved with:
– closedby="any"
– overscroll-behavior: contain
Also, Chris Coyier showed us how to animate <dialog>s, which I think many of us know how to do already, but it’s so easy to mess up. I have to Google it every time (it’s those bleeping @starting-styles).
What happened at CSS Day 2026?
CSS Day, the annual CSS community conference, was held in Amsterdam on the 11th and 12th of this month (so two days, technically). While there wasn’t a livestream this year, recordings will become available in late June. Until then, check out CSS Day on Bluesky as well as the #CSSDay Bluesky feed to see what happened on stage, what happened behind the scenes, and even the slides from some of the talks.
And no, there weren’t any flamethrowers this year, but it wasn’t DOOM-free either (if you know, you know).
CSS Wordle
What a week it’s been, especially with everything that transpired at CSS Day, but if you have any energy left I highly recommend a round (or several rounds) of Sunkanmi Fafowora’s CSS Wordle, which I’ve literally been obsessed with for the last week.
Source: CSS-Questions (don’t worry, this was yesterday’s answer).
There’s a moment in almost every usability session where a participant pauses at the login screen, types something, and glances up: checking whether they’re “doing it right.” That pause is a clear sign. They’ve already clocked that this isn’t a real app, and every data point...
There’s a moment in almost every usability session where a participant pauses at the login screen, types something, and glances up: checking whether they’re “doing it right.” That pause is a clear sign. They’ve already clocked that this isn’t a real app, and every data point collected after that moment is filtered through that awareness.
In financial product testing, the problem is sharper. Finance users are trained to notice when something feels off: a balance that doesn’t add up, a field that accepts anything. When a banking prototype skips real authentication, participants don’t just disengage; they stop mid-session to flag it. The team walks away with findings that reflect how users behave in a demonstration, not in a real product.
The fix is narrower than you’d think. Identify the moment where participant trust is established and make that interaction real. In a banking app, that moment is the login.
This tutorial builds it: credentials that validate, a live error state, and a biometric animation that feels native — no code required.
What We’re Building: A Login That Behaves Like A Shipped Product
The login flow, built around Pie Bank, a mobile banking prototype, includes functional text inputs, a masked password field, credential validation, a live error state, and a Face ID animation timed to feel indistinguishable from iOS.
What you’ll need:
A login UI from Figma (or any supported design tool)
ProtoPie Studio — free to start, everything in this tutorial works on the free plan
A Lottie file for the Face ID animation (this one is what we used)
Step 1: Import From Figma Choose Scene, Not Flattened
In Figma, open the ProtoPie plugin with your login frame selected and choose Scene when exporting. Flattened collapses everything into a single image; Scene preserves your layer hierarchy so every element arrives in ProtoPie as a separate, targetable layer.
Before moving on: rename every layer meaningfully. “Input Username” not “Rectangle 14”. You’ll reference these names in formulas: vague names compound into real time lost.
Step 2: Swap Static Fields For Inputs That Actually Accept Text
ProtoPie’s native Input layer accepts real keyboard entry: participants type actual text, not tap a placeholder. Go to Text → Input, drag an Input layer onto your canvas, and nest it inside your username field group. Match it visually: placeholder text Username, background fill and font to match your design.
Hit preview. Click the field. Type. That’s the prototype starting to behave like an app rather than depicting one.
Rename this layer Input Username, duplicate it, and nest the copy inside your password field group.
Step 3: One Property Change Masks The Password
On the duplicated layer, change placeholder text to Password and set Type to Text Password. ProtoPie handles the masking: no custom logic needed.
Preview both fields: username shows text, password shows dots. It already feels real, and you haven’t written a single condition.
Step 4: Build The Destination Scene Before Wiring Navigation
Add a new scene, even a blank one. The most common sequencing mistake in ProtoPie is trying to wire a navigation response before a destination exists. Create it first.
Step 5: Wire The Button: It Works, But It Still Lets Everyone Through
Select Log In, add a Tap trigger, set response to Jump, target your dashboard scene, transition Slide in from right to left.
Preview and tap. It navigates: but for any input, including nothing. The prototype is still lying. The next two steps are the fix.
Step 6: Add Variables So The Prototype Remembers What Was Typed
At the bottom-left of ProtoPie, add two Text type variables: username and password. Bind each to its input layer with a formula:
Enable the debug icons: green overlays will show live variable values as you type. When you see your keystrokes appear in real time, the binding is confirmed.
Step 7: Add A Condition So Only Valid Credentials Get Through
Go back to the Tap trigger on the login button. Add a Condition with two rules, both must be true:
Move the Jump response inside this condition. Wrong credentials, empty fields, wrong format: none get through. Participants now have to actually log in. That single constraint changes the texture of every test session that follows.
Step 8: Build The Error State, The Interaction Most Prototypes Skip
Find your error message layer, rename it Error Text, set initial opacity to 0. Add a second condition (the inverse of the first), and inside it, a Change Property response setting Error Text opacity to 100.
Wrong credentials: error appears. Correct credentials: dashboard. Two outcomes: which is what makes this testable, not just demonstrable.
Step 9: Add the Face ID Animation, The Detail That Makes Testers Ask “Is This Real”
Go to Media, drag a Lottie layer onto canvas, load your Face ID file, and position it off-screen above the iPhone frame. On your Login with Face ID button, add a Tap trigger (rename it Tap Face ID) with four responses in sequence:
Move: Lottie container to Y: 60
Playback: Seek: time 0s (resets so it always plays from the start)
Playback: Play: Lottie file
Jump: to dashboard
Step 10: Stagger The Timing, This Is What Makes It Feel Native
Without delays, all four responses fire at once and the scene jumps before the animation plays. Add offsets:
Response
Delay
Move
0s
Seek
0s
Play
0.5s
Jump
1s
Enable Reset selected scenes on Jump: without it, navigating back leaves the animation stuck at Y: 60.
Preview: tap Face ID, animation drops in, plays, screen transitions. A biometric login indistinguishable from the real thing.
You can download Pie Bank, Chapter 1: Login Flow and explore it freely.
A Login This Real Changes What You Can Learn From Your Prototype
When authentication actually works, the error state becomes a genuine research touchpoint: do users understand the message, do they retry, do they reach for Face ID instead? These are questions a faked login can’t answer.
In stakeholder reviews, the flow speaks for itself. In engineering handoff, the interaction panel documents the behavior (conditional logic, variable bindings, timing) so engineers see intent, not interpretation.
This is why FinTech teams invest in login fidelity even when the login isn’t the feature being tested. It’s where participant trust is established. Get it right, and everything downstream produces better signal.
This tutorial is part of the FinTech Prototyping with ProtoPie series on the ProtoPie blog. The series builds Pie Bank from the ground up across four chapters, covering the dashboard, money transfer logic, and camera integration. If this tutorial was useful, the rest of the series goes further.
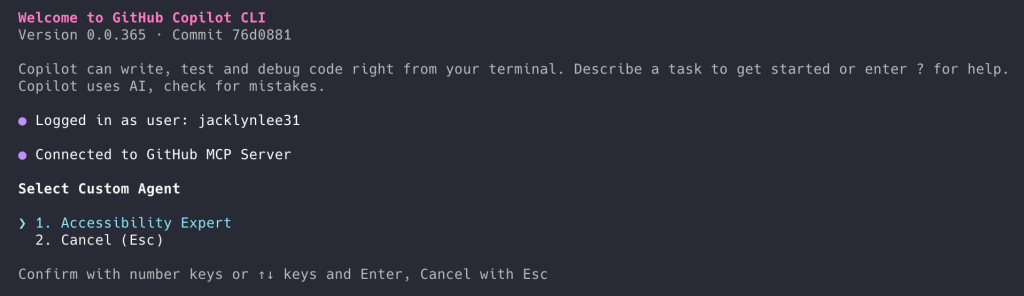


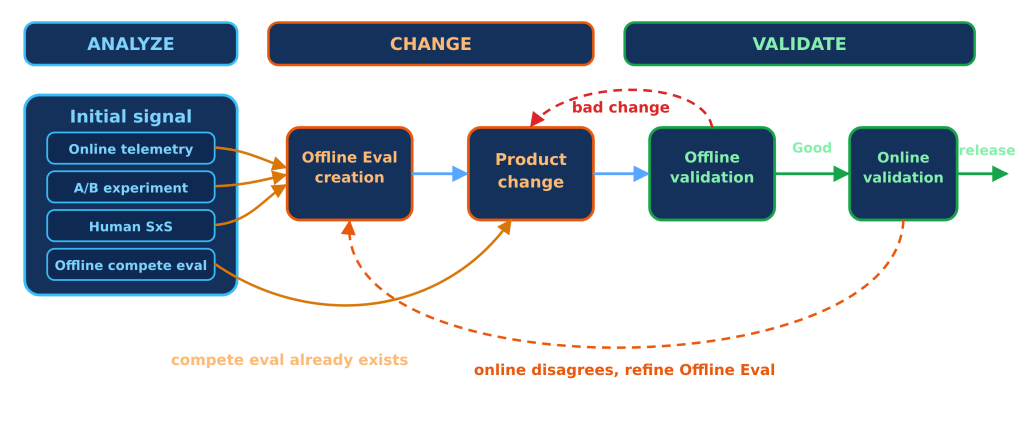


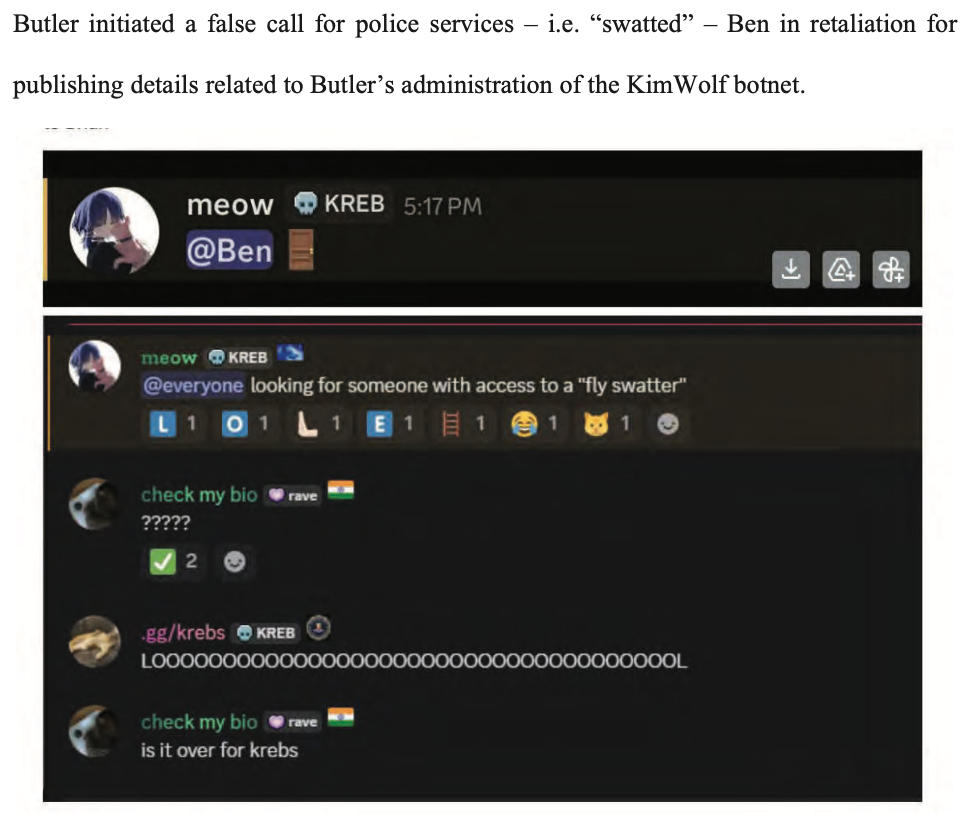


 Step 1: Import From Figma Choose Scene, Not Flattened
 Step 2: Swap Static Fields For Inputs That Actually Accept Text

 Step 6: Add Variables So The Prototype Remembers What Was Typed
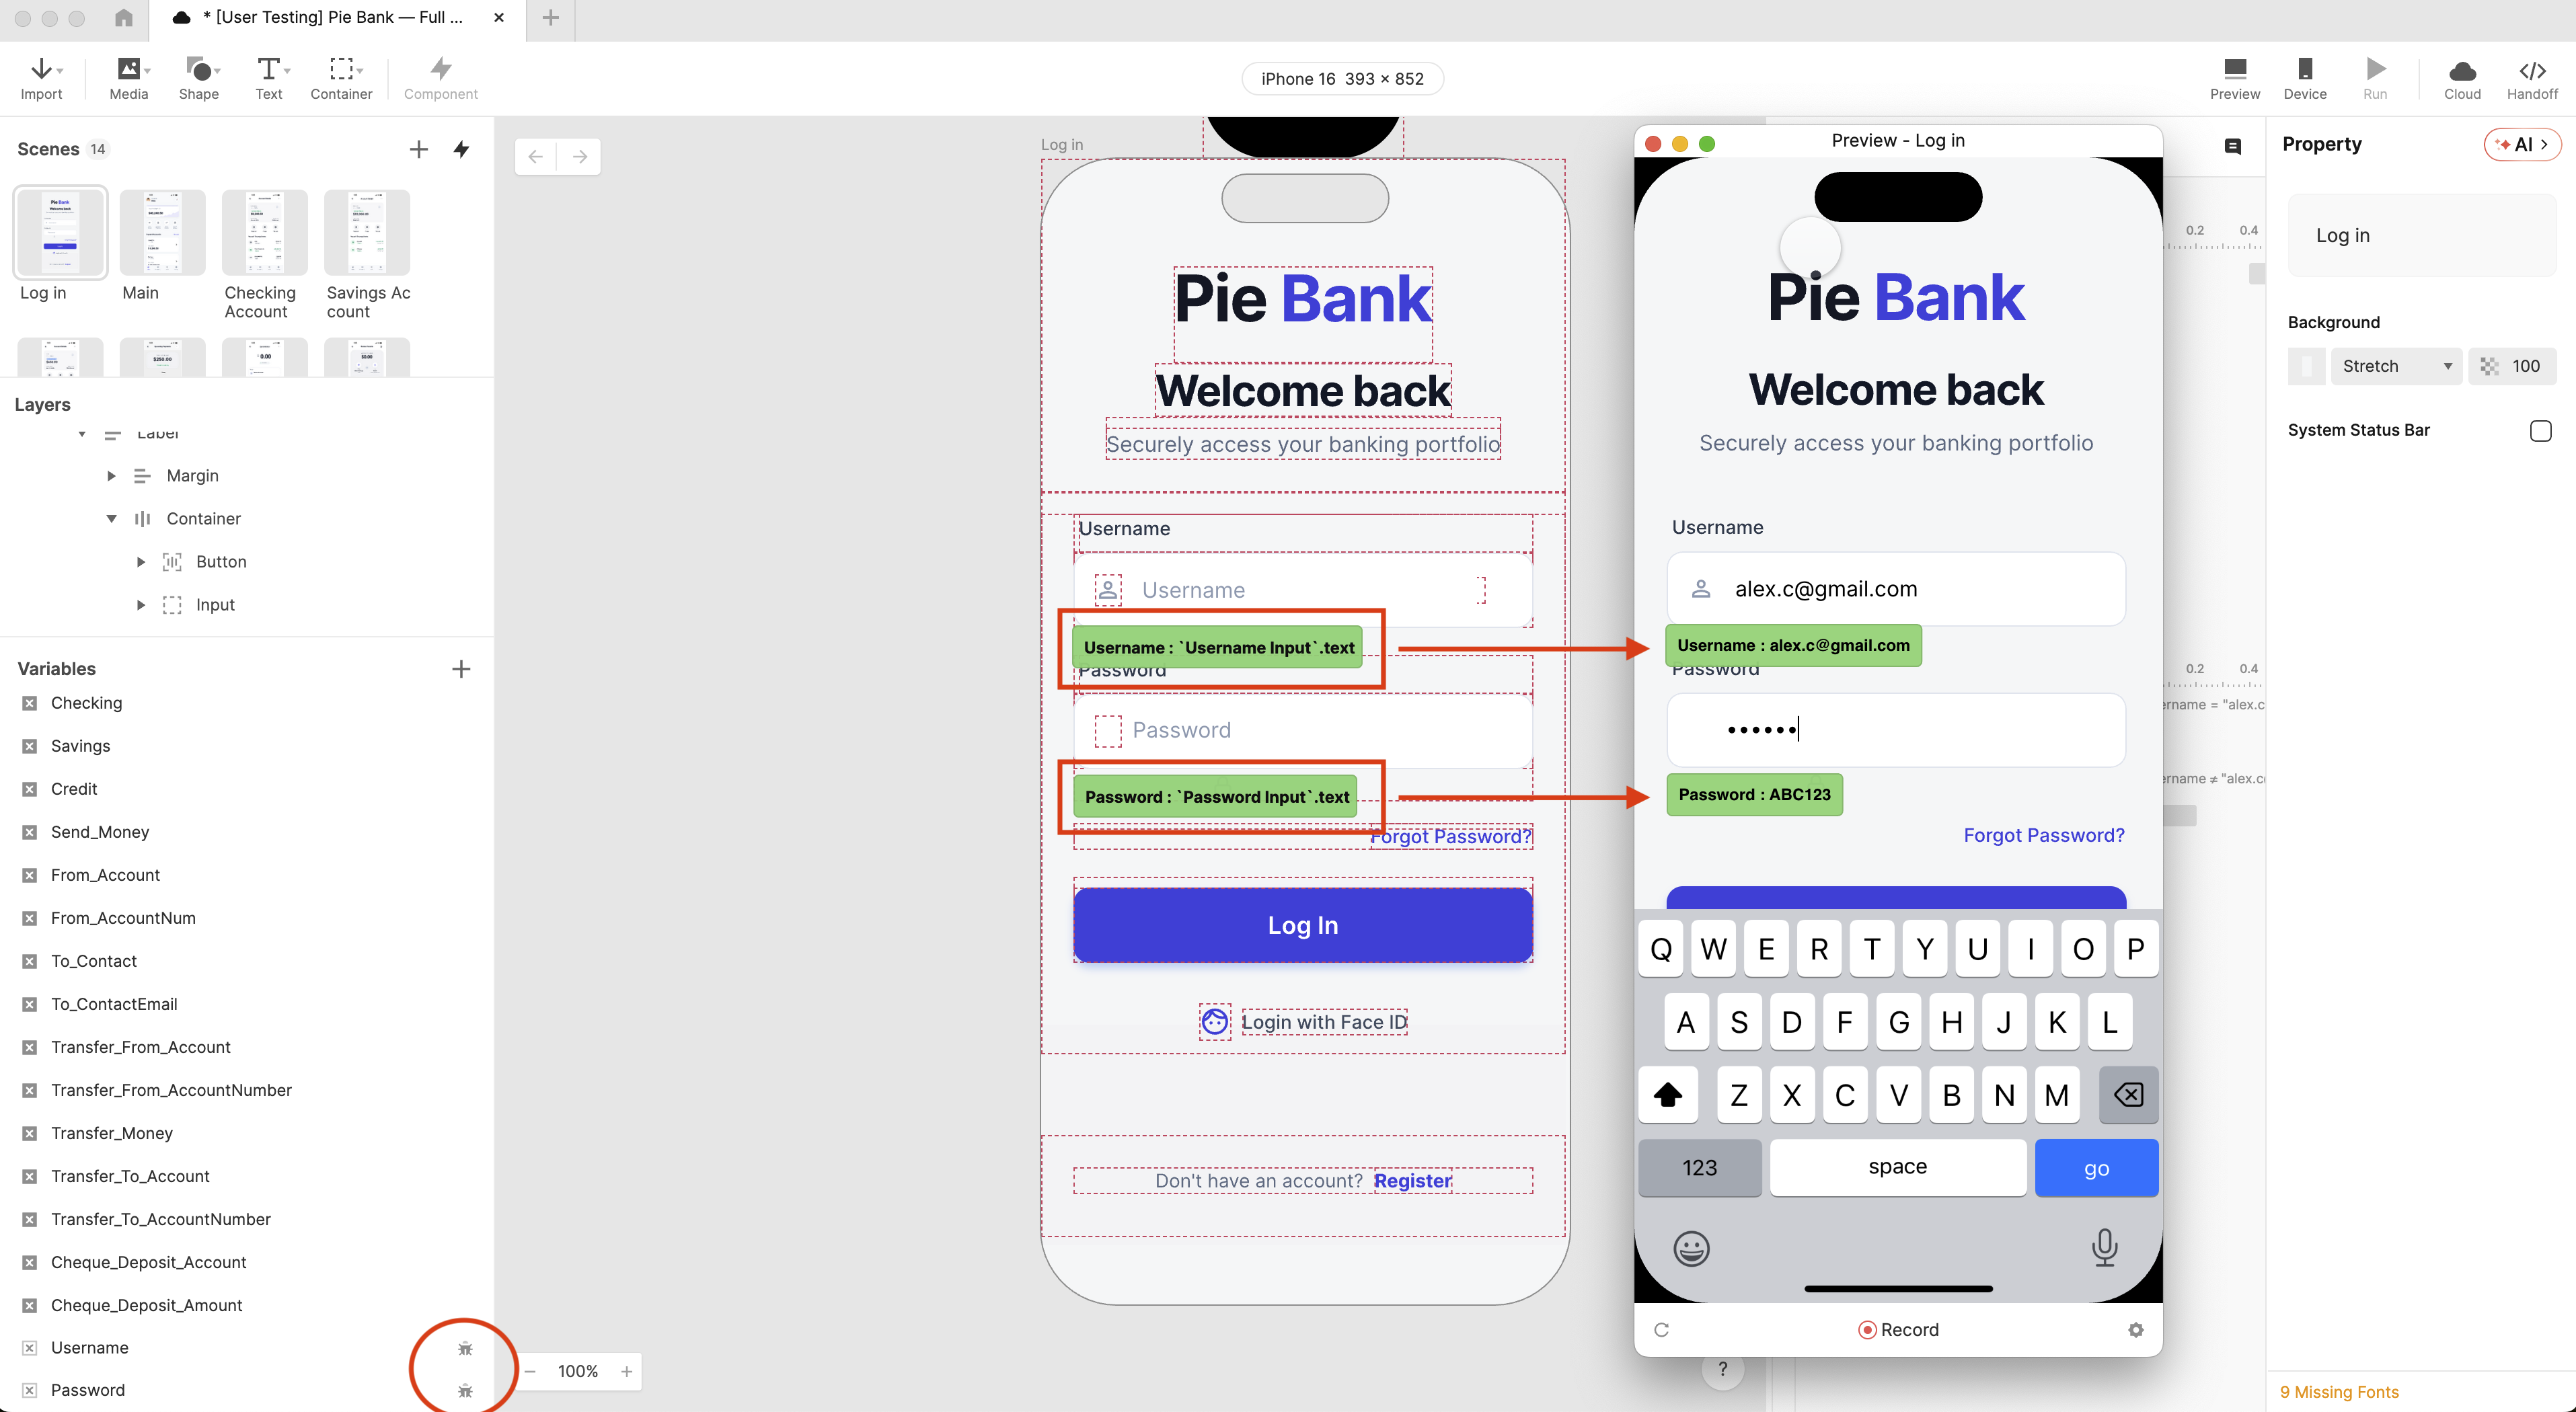
 Step 8: Build The Error State, The Interaction Most Prototypes Skip
 You can download