No full content extracted yet.
Extracting…Julio Codes
active · last success 2026-06-18 23:26
-
-
Want to learn how to build websites? Then this is the tutorial for you. In this video series, I am going to teach you HTML from scratch. Over the next several videos you will learn the basics of HTML as well as advanced concepts. Upon completion of this video series you will...
Want to learn how to build websites? Then this is the tutorial for you. In this video series, I am going to teach you HTML from scratch. Over the next several videos you will learn the basics of HTML as well as advanced concepts. Upon completion of this video series you will have a solid understanding of what HTML is and how it works. Lesson 2 covers the HTML head element and metadata. ☕ Buy me a coffee Feeling a little generous? Buy me a coffee 😊 🔗 https://www.buymeacoffee.com/juliocodes 🌐 Hostinger Get affordable domain and web hosting service with Hostinger. Save up to 91%* off your entire order by using the link below and my coupon code. 🔗 hostinger.com/juliocodes Discount code: JULIOCODES 🔔 Subscribe 🔗 https://bit.ly/2Q3pCiB 📱 Social Media 🔗 https://www.instagram.com/juliocodes ⏱️Timestamps 00:00 Intro 00:45 What is metadata? 01:06 Meta charset 02:02 Meta author 02:53 Meta description 03:58 Meta viewport 08:01 The title element 08:43 Link favicon 10:56 Link CSS 12:14 The style element 12:42 Link (script) JavaScript 14:11 Outro ⚠️ Disclaimer This video description contains affiliate links, which means that if you purchase one of the products or click on certain links, I’ll receive a small commission. #html -
Want to learn how to build websites? Then this is the tutorial for you. In this video series, I am going to teach you HTML from scratch. Over the next several videos you will learn the basics of HTML as well as advanced concepts. Upon completion of this video series you will...
Want to learn how to build websites? Then this is the tutorial for you. In this video series, I am going to teach you HTML from scratch. Over the next several videos you will learn the basics of HTML as well as advanced concepts. Upon completion of this video series you will have a solid understanding of what HTML is and how it works. Lesson 1 covers the HTML document structure as well as installing basic software. ☕ Buy me a coffee Feeling a little generous? Buy me a coffee 😊 🔗 https://www.buymeacoffee.com/juliocodes 🌐 Hostinger Get affordable domain and web hosting service with Hostinger. Save up to 91%* off your entire order by using the link below and my coupon code. 🔗 hostinger.com/juliocodes Discount code: JULIOCODES 🔔 Subscribe 🔗 https://bit.ly/2Q3pCiB 📁 Assets & Resources Chrome 🔗 https://www.google.com/chrome/ Visual Studio Coode 🔗 https://code.visualstudio.com/ 📱 Social Media 🔗 https://www.instagram.com/juliocodes ⏱️Timestamps 00:00 Intro 00:41 Overview 00:50 What is HTML? 01:18 Installing basic software 02:56 Customizing VS Code 04:21 Creating an HTML file 04:57 HTML document structure 07:47 Outro ⚠️ Disclaimer This video description contains affiliate links, which means that if you purchase one of the products or click on certain links, I’ll receive a small commission. #html -
#javascript
-

If you found this content useful, please let me know by smashing the like button and subscribing to the channel. I would greatly appreciate it. Also, if you have any feedback, questions or concerns, let me know in the comments section 💬. Thanks ☺️ #css #shorts
If you found this content useful, please let me know by smashing the like button and subscribing to the channel. I would greatly appreciate it. Also, if you have any feedback, questions or concerns, let me know in the comments section 💬. Thanks ☺️ #css #shorts -

The border-image property draws an image around a given element. As the name suggests, we can use images, but not only that, we can use gradients as well. In this example, we create a box and then we apply a repeating linear gradient as the border image. The 1 value is the...
The border-image property draws an image around a given element. As the name suggests, we can use images, but not only that, we can use gradients as well. In this example, we create a box and then we apply a repeating linear gradient as the border image. The 1 value is the border-image-slice. When one position is specified, it creates all four slices at the same distance from their respective sides. If you found this content useful, please let me know by smashing the like button and subscribing to the channel. I would greatly appreciate it. Also, if you have any feedback, questions or concerns, let me know in the comments section 💬. Thanks ☺️ #css #shorts -

The place-items property in CSS is shorthand for the align-items and justify-items properties, combining them into a single declaration. A common usage is horizontal and vertical centering with CSS Grid as shown in this example. If you found this content useful, please let me...
The place-items property in CSS is shorthand for the align-items and justify-items properties, combining them into a single declaration. A common usage is horizontal and vertical centering with CSS Grid as shown in this example. If you found this content useful, please let me know by smashing the like button and subscribing to the channel. I would greatly appreciate it. Also, if you have any feedback, questions or concerns, let me know in the comments section 💬. Thanks ☺️ #css #shorts -

The :is() CSS pseudo-class function takes a selector list as its argument, and selects any element that can be selected by one of the selectors in that list. This is useful for writing large selectors in a more compact form. If you found this content useful, please let me...
The :is() CSS pseudo-class function takes a selector list as its argument, and selects any element that can be selected by one of the selectors in that list. This is useful for writing large selectors in a more compact form. If you found this content useful, please let me know by smashing the like button and subscribing to the channel. I would greatly appreciate it. Also, if you have any feedback, questions or concerns, let me know in the comments section 💬. Thanks ☺️ #css #shorts -

In this example, we have 2 snippets that do exactly the same thing. The main difference is that one of them saves you some lines of CSS. Snippet number 2 will use the min function and subtract 30px (this ensures you get equal spacing of 15px each side) from 100% to give us...
In this example, we have 2 snippets that do exactly the same thing. The main difference is that one of them saves you some lines of CSS. Snippet number 2 will use the min function and subtract 30px (this ensures you get equal spacing of 15px each side) from 100% to give us spacing we want on the sides while also limiting the width to 840px. Then, centering the container by applying margin left and right of auto. If you found this content useful, please let me know by smashing the like button and subscribing to the channel. I would greatly appreciate it. Also, if you have any feedback, questions or concerns, let me know in the comments section 💬. Thanks ☺️ #css #shorts -
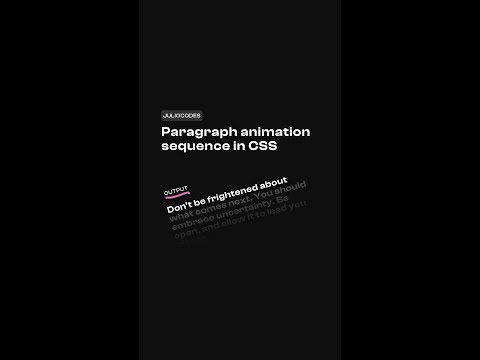
In this example, we use a inline styles to set a custom property with a specific delay. This way we can use the custom property to apply the delay based on the given number. Before custom properties, we had to use something like nth-child within the CSS to apply a delay to...
In this example, we use a inline styles to set a custom property with a specific delay. This way we can use the custom property to apply the delay based on the given number. Before custom properties, we had to use something like nth-child within the CSS to apply a delay to individual items. If you found this content useful, please let me know by smashing the like button and subscribing to the channel. I would greatly appreciate it. Also, if you have any feedback, questions or concerns, let me know in the comments section 💬. Thanks ☺️ #css #shorts -

In this lesson we will use HTML, CSS, and JavaScript to animate a website from scratch. Upon completion, you will understand how to utilize CSS grid template areas, keyframes, as well as JavaScript animations on mouse move. ☕ Buy me a coffee Become a member and access the...
In this lesson we will use HTML, CSS, and JavaScript to animate a website from scratch. Upon completion, you will understand how to utilize CSS grid template areas, keyframes, as well as JavaScript animations on mouse move. ☕ Buy me a coffee Become a member and access the premium SCSS source code for my responsive layout templates for free. 🔗 https://www.buymeacoffee.com/juliocodes 🌐 Hostinger Get affordable domain and web hosting service with Hostinger. Save up to 91%* off your entire order by using the link below and my coupon code. 🔗 hostinger.com/juliocodes Discount code: JULIOCODES 📚 CSS animations course newsletter Subscribe to the newsletter to receive progress updates as well as a significant discount on launch day. 🔗 https://courses.juliocodes.io 🔔 Subscribe 🔗 https://bit.ly/2Q3pCiB 📁 Assets & Resources GitHub 🔗 https://github.com/JulioCodes/AwardWinningAnimations 📱 Social Media 🔗 https://www.instagram.com/juliocodes ⏱️Timestamps 00:00 Intro 01:00 Setup 02:50 HTML 17:52 CSS 01:11:05 JavaScript ⚠️ Disclaimer This video description contains affiliate links, which means that if you purchase one of the products or click on certain links, I’ll receive a small commission. #responsivewebsite #animatedwebsite -

HTML only accordion! The details element allows us to create a widget that we can toggle on and off. It is accompanied by the details element, which acts as a label. When the user clicks/focuses on the widget, the content will be displayed. By default, this widget is closed,...
HTML only accordion! The details element allows us to create a widget that we can toggle on and off. It is accompanied by the details element, which acts as a label. When the user clicks/focuses on the widget, the content will be displayed. By default, this widget is closed, but we can add the ‘open’ attribute to show one in particular. -

The support for these new properties is roughly 80%. Maybe not quite production ready, but considering this is only a month old, we’re almost there!
The support for these new properties is roughly 80%. Maybe not quite production ready, but considering this is only a month old, we’re almost there! -

I've been working on this premium course for the past few months and I am happy to say that it's finally nearing completion. The course will teach you everything that you need to know to get started with CSS animations. I will guide you step by step as we learn about CSS...
I've been working on this premium course for the past few months and I am happy to say that it's finally nearing completion. The course will teach you everything that you need to know to get started with CSS animations. I will guide you step by step as we learn about CSS transition, keyframes, transform, positioning, pseudo-elements, and more. You will also get to see my thought process and how I breakdown and solve problems. Once you learn about the fundamentals of CSS animations, together, we will build 40+ beautiful CSS-only animated components. 🌐 Hostinger Get affordable domain and web hosting service with Hostinger. Save up to 91%* off your entire order by using the link below and my coupon code. 🔗 hostinger.com/juliocodes Discount code: JULIOCODES 🔔 Subscribe 🔗 https://bit.ly/2Q3pCiB 📱 Social Media 🔗 https://www.instagram.com/juliocodes ✨ Giveaway instructions I will be drawing 5 random winners to receive my animations course for free. In order to enter the giveaway, subscribe to the channel, like the video, and leave a comment down below. Make sure to include your social media handle (Instagram/TikTok) in the comment, this is how I will get in touch with you if you win. You are only allowed one comment; multiple comments will result in disqualification. The giveaway will end on September 28th. The winners will be chosen using a random comment picker and announced on social media. Be sure to follow me on social media to stay updated. Also, subscribe to the course newsletter to stay up to date. No spam, I promise 😊 📰 Course newsletter 🔗 https://courses.juliocodes.io/ 🎵 Music Song: Colin Root - Blackout (No Copyright Music) Music provided by Tunetank. Free Download: https://bit.ly/2UYtQY4 Video Link: https://youtu.be/5dnw5QbiUmQ ⚠️ Disclaimer This video description contains affiliate links, which means that if you purchase one of the products or click on certain links, I’ll receive a small commission. -

In this lesson we will use HTML, CSS, and JavaScript to build a mobile first responsive NFT marketplace website. We will also be utilizing the ScrollReveal library to add on scroll animations. Upon completion, you will have an understanding of how to build layouts using CSS...
In this lesson we will use HTML, CSS, and JavaScript to build a mobile first responsive NFT marketplace website. We will also be utilizing the ScrollReveal library to add on scroll animations. Upon completion, you will have an understanding of how to build layouts using CSS Flexbox and Grid. ☕ Buy me a coffee Become a member and access the premium SCSS source code for my responsive layout templates for free. 🔗 https://www.buymeacoffee.com/juliocodes 🌐 Hostinger Get affordable domain and web hosting service with Hostinger. Save up to 91%* off your entire order by using the link below and my coupon code. 🔗 hostinger.com/juliocodes Discount code: JULIOCODES 🔔 Subscribe 🔗 https://bit.ly/2Q3pCiB 📁 Assets & Resources Icons 🔗 https://remixicon.com/ ScrollReveal 🔗 https://scrollrevealjs.org/ Design 🔗 https://uihut.com/ GitHub 🔗 https://github.com/JulioCodes/Artistry 📱 Social Media 🔗 https://www.instagram.com/juliocodes ⏱️Timestamps 00:00 Intro 01:48 Setup 07:38 Header - HTML 17:25 Showcase - HTML 25:57 Reset - CSS 35:30 Nav - CSS 54:32 JavaScript 1:07:56 Showcase - CSS 1:30:50 ScrollReveal ⚠️ Disclaimer This video description contains affiliate links, which means that if you purchase one of the products or click on certain links, I’ll receive a small commission. #responsivewebsite #NFT - End of feed
